Sunday, July 3, 2016

Awesome iPad App: Touchcast Studio

Using video in the classroom helps those visual learners master content and keeps them engaged. Unfortunately video tends to be a passive activity where students simply sit and watch. No more! Now with TouchCast teachers (and students) can make interactive videos where students can tap the screen to interact with the video, take a poll, view a website within the video, scroll through a document, and more. Think of it as ThingLink for videos.

TouchCast is a free iPad app that teachers and students and students in most grade levels can use. Here is a TouchCast made by Lindsay Baker (@linzbaker), an educator from California. In this video she models many of the interactive video features available. 


If the interactive part doesn't work, try viewing the video from the TouchCast website at https://www.touchcast.com/baker1123/heres_how_to_use_a_touchcast_in_your_classroom

TouchCast produces a channel called EduCasts that features the best educational TouchCasts being made. These videos will give you ideas of how other teachers and classrooms are using TouchCast. You can view them at http://www.touchcast.com/educasts/ along with lesson plans at http://www.touchcast.com/lessonPlan/

Getting started with TouchCast is easy. Sign up is free for both teachers and students, but does require an email address. Creating a touchcast is done in 5 steps:

1. Scripting and planning

Have students write out a script, planning what they want to say and allowing time (pauses) in the script for vApps to appear on screen and stay there for a few seconds.

2. Filming

Launch TouchCast, make sure you are on the Cast Side, and tap the Start from Scratch theme.

The Effects tab at the bottom of the screen lets you add filters, add guides to help line things up, and add Green Screen.

You can also add Whiteboards where you can annotate on the screen.


3. Editing video clips

All of the clips from filming are in the Projects tab. You can re-order the clips, trim them down, duplicate and add transitions. Put all the clips together in the order you want them to appear in the video. Once individual clips are merged into one large video, import the video back into TouchCast using the Start from Scratch theme again.

4. Preparing interactive content

To add interactive content (vApps), tap the vApps button. Tap any of the apps to customize it and then tap Use. All selected vApps will appear in the vApp tray at the bottom of the screen, ready to use during the touchcast simply by tapping it. They can be positioned anywhere on the screen by dragging it, resized, and changing the options by tapping the gear icon. When everything is done be sure to save the project.

5. Recording the touchcast.

Press the red Record button and start recording, adding the vApps as you go. Tap the Done button when you are finished and you can preview the touchcast. You can always go back and edit the video or the vApps.

6. Exporting

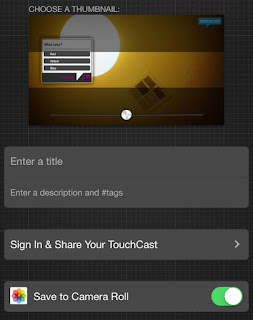
When everything is like you want, tap Export TouchCast, name the touchcast and press Save. When you are signed in to your account it will save to your TouchCast channel as well as giving you the option to save to the Camera Roll.

There is a lot of power in this little app that allows you and your students to create some high quality videos. It seems to have a little learning curve and certainly requires some pre-planning (scripting), but I think students will enjoy working with it.

In my classroom this year, I plan on having a mini video studio set up in one corner of the room with green screen capabilities. Students will be able to use the iPads to create reports, screencasts, and other projects. I think TouchCast will be a great addition to this area.

Have you used TouchCast with your students? Let me know in the comments what you have done with it.

Read More »

Saturday, July 2, 2016

Reading log alternatives: a comparison

I never really thought about reading logs until last year when I read a few posts by one of the bloggers I follow, Pernille Ripp (@pernilleripp). She has written a few posts on the subject, pointing out how reading logs actually discourage students from reading. Curious about this whole idea, I searched the topic and found that many other educators feel the same way. They assign reading logs only because they have to or its the way its always been done, not because they actually help students. In fact, a new post just this past month, In the Classroom: The Problem with Reading Logs and What I Did About It, caught my eye and brought this topic to the forefront of my thoughts again.

After reading her thoughts on it and examining my own habits as a parent, I realized that reading logs probably aren't the best way to hold students accountable. I read with my children every night, but I'm really bad about making sure it gets recorded in their log. In fact, I don't pay attention to the time required on the log at all. Last year my first grader was supposed to read 15 minutes a night. Instead, I just had her read a picture book or a beginner's chapter book until she was done, regardless of whether it took 5 minutes or 20. And then I just initialed for the time.

What I think students like better and is more motivating, is simply letting them choose the books they want to read and keeping track in a list. Not recording how many pages or how many minutes (because they always want to know the maximum number they have to read). There are several digital tools that help with this. I've blogged about Biblionasium, Bookopolis, and Goodreads, all websites where students can interact within the community, recording the books they read, sharing recommendations, writing reviews, and reading reviews from their peers.

Deciding which tool to use within your own class can be a tough decision. There are things to like about each one of these platforms, and limitations that make me think twice. I use Goodreads for myself and love it, but I can't use it with my class because of the age restriction. Here's a chart comparing features from all three platforms.

Please let me know in the comments if there is another criteria that I should be using to compare them. Also share any feedback you have on using any of them in the classroom, or suggest one that I haven't discovered yet.

Read More »

Cool and useful website: Bookopolis

Educators know that the more students read the better readers they become. In most classrooms students are asked to read every night. There are many different ways students can record their daily reading. Bookopolis is a website teachers can use to have students record books they are reading and discover new ones. They can see what their classmates are reading, read book reviews by other students, and share what books they are interested in reading.


Setup

Registration is completely free. All users go to the http://www.bookopolis.com website to create their account. Teachers can create an account using their email address or sign in using Google. If they use Google Classroom, Bookopolis will import their Classrooms and student rosters automatically. Student accounts can also be created manually with the teacher creating the username and passwords.

After classes and student accounts have been created, the teacher goes to My Dashboard to manage accounts and see what students are doing. The teacher can click on a student name to see their "world". The world view shows the student's books, badges, and recommend books.

Shelves

To manage books, users click on My World. Students can search for books and add them to one of three shelves: Reading it Now, I Read It, and I Want to Read It. When choose books students can see ratings from other students as well as read reviews. These ratings and reviews are not limited to just students within their class.

Rate and Review

Once a book has been read students can share their rating, leave a review, and recommend it to their friends. Each of the following four screens is available to students. 

It's this socialization and sharing that makes sites like Bookopolis appealing to students and teachers alike. Students can see what their friends are reading and discover new books based on their interests and what they've read in the past. This socialization, sharing, and discovery with peers encourages students to try new books and read more.

Read More »

Awesome iPad App: Videoliscious

Videoliscious is a simple video creation app for iPads. The app is free, but has a 60 second limit. It's simple to use, has a clean interface, and is great for creating short videos on the go.

There are only 3 steps needed to create the videos. The app makes it super easy for students by walking them through each step.

Step 1

Select videos and photos you want to use. These can be from the Photos app or take live video with the camera. It includes a tool to let you trim your video so you can include just the right shot.


Step 2

Add narration to the video. After choosing microphone only, students record their voice as they narrate over videos and photos. The videos and photos chosen in Step 1 appear in the bottom right corner. As the student talks, they tap on each video or picture. These are all combined to make the full video.

Step 3

Add background music from the Videoliscious library. The free version is severely limited in the number of options, but the chosen music is ducked under the narration from Step 2.

Finished videos can only be saved to Facebook, Twitter, YouTube or emailed to the teacher. They are not saved to the camera roll.

This app is straight forward and easy to use. Students can easily master it in a matter of seconds. It's great for short (60 second) projects.  One limitation is where the video is saved. Since it's not saved to the camera roll, the only viable option is to email it to the teacher.

Check out these two blogs for some ideas of how this app could be used in the classroom.

Oral Presentations
Vocabulary

Although the 60 second time limit and inability to save to the camera roll are limitations, I think I will include this app in my video toolbox on our class iPads. I'm excited to share it with my students to see what they come up with. Let me know in the comments how you are using this app with your students!


Read More »

Friday, July 1, 2016

Writing math equations on Blogger

Yes, you math teachers have some unique writing requirements! You have unique symbols, need superscript and subscript letters and numbers, and other precise ways ways of writing out information. I am no mathematician, but I feel your frustration when it comes to writing out these equations in Blogger.

Fortunately there are many mathematicians on the internet that also blog and have found solutions to this problem.

In order to write superscript and subscript letters, you have to jump to the HTML side and add in some codes there. It's not that complicated, but in my opinion it would be much easier if there were a button to do it for you. Some other blogs (Wordpress) apparently have this functionality. If you are not afraid of a little HTML and just need the superscript and subscript letters, jump over to http://www.learnerswings.com/2014/09/how-to-write-superscript-and-subscript.html for a quick tutorial.

If you also have to do those other fancy math equations with brackets, fractions, and all sorts of other formatting, there is another way to do that as well. This is a little more complicated as it involves installing a script on your blog. There is a computer programming language out there called LaTeX that allows you to write out math equations in plain text and have it appear properly on your blog. Directions are at http://pleasemakeanote.blogspot.com/2008/09/how-to-post-math-equations-in-blogger_06.html (scroll towards the bottom).

If you know of a better/easier way to write math equations on Blogger, please let me know in the comments below. I'd also like to know how it can be done with Edublogs and KidBlog.

Read More »

Kahoot and Quizizz Comparison


Students love playing games. Unfortunately they may not enjoy studying for tests or reviewing material as much. Fortunately for teachers there are two great tools that get students excited about reviewing and studying. Kahoot! and Quizizz are both web based formative assessment tools that work on any device. Because of the competitive, game based aspect students are excited and motivated to answer the questions. There are several advantages to using these digital tools.

  • Most students are naturally competitive. The leader boards on these games encourage students to try harder so their names will appear.
  • Both tools are web based so it doesn't matter what device students have: desktop, laptop, iPad, cell phone, Chromebook - they all work.
  • Students can work in pairs or small groups to discuss and answer and submit it together.
  • As with all digital formative assessment tools, these quizzes are graded automatically and provide immediate feedback for students and teachers.
  • The reports for both platforms are phenomenal, breaking down responses by student and question.

Although both platforms are game-based and have many similarities, there are a three big differences that teachers need to be aware of.

Question/Answer Projection

Kahoot! shows the question and answer choices on the classroom projector. On their device, students only see buttons that correspond to the answer choices. They have to look back and forth between the large screen and their device. Kahoot! has a very good reason for being setup like this.

Quizizz, on the other hand, doesn't need the class projector at all. Both the questions and the answer options appear on the students' devices. This frees up the teacher's computer so they can view the game's results in real time.  Tony Vincent, on his Learning in Hand blog, has an excellent graphic illustrating this point.

Pace

With Kahoot! the teacher sets the pace. The teacher determines the response time for each question. They can also choose to pause after each question, discuss answers and deal with any misconceptions. This enables a deeper discussion of the material and why certain answers are correct. However, the teacher gets to determine the pace - all students have to answer the same question at the same time. Because Quizizz is player-based, students can work through it at their own pace, answering questions quickly or taking their time. Response time in Quizizz can be set up to 15 minutes.

I consider myself a smart person, but sometimes I just process information a little slower. Games like Kahoot! are frustrating for me because I feel rushed and cannot take the time I need to 1) process the question 2) look for the answer and 3) find the answer on my device. Because Quizizz is player-based, I can work at my own pace and take the time I need to process the information, provided the teacher has set enough response time.

Homework

Kahoot!, by design, is meant to be played whole class. Because of that, games cannot be assigned to students as homework or to work on later. Quizizz can be assigned as homework that students have up to two weeks to complete. If you are using Google Classroom, Quizizz has full integration, letting you create Classroom assignments right from within the quiz.

I love both platforms and believe teachers need to have both tools in their formative assessment toolbox. They each have their strengths. Both are extremely easy to use and provide great data for teachers.  These are both great tools when its time to review and prepare students for tests.

Read More »

Formative Assessment Toolbox: Quizizz

Formative assessments are easy to do with the many digital tools available. One great tool for your formative assessment toolbox is a new website, Quizizz. You may have read my post on Kahoot!, a game-based formative response system. Quizizz is a similar tool, but with several differences. Quizizz is web-based so it can be used on any internet connected device, whether it's a desktop computer or mobile device.
  1. Teachers create a free account at http://www.quizizz.com.
  2. Create your first quiz by clicking the Create button. You'll first be prompted to name your quiz and include a cover image. Quizzes can be created from scratch or imported from an csv formatted file. This is a great way to bring in quizzes teachers may have created with other tools.

  1. This is where you enter your questions. There are some basic text formatting options, including the ability to insert symbols such as fractions, math, Greek, Latin, and currency. You can also include an image for your question.
  2. Set the time for the question. The default is 30 seconds, but there are options from 5 seconds to 15 minutes.
  3. You can add up to 4 possible answers. Don't forget to set the correct answer!
  4. A live preview of the question appears on the right side. Students will see the answer choices on their device. Answers will be in a random order for each student.
  5. Teachers can search for and include questions from public quizzes.
  6. Click New Question to create a new blank question.
  7. Click Finish when you are done.
  8. Specify the grade level and subject area for the quiz.
Quizzes can then be played immediately or assigned as homework. If the homework option is chosen, teachers can set the day and time (up to two weeks) the quiz must be completed by. These homework quizzes can be shared directly with Google Classroom too!

Regardless of which option is used, there are several settings teachers can use to customize the game play.

To take the quiz, students go to http://login.quizizz.com and enter the game code for that quiz. It's that easy!
Try out Quizizz and let me know what you think. Was it easy for you to create and assign quizzes? What did your students think of the game play?

Read More »