Sunday, July 23, 2017

#mysteryskype prep activities

Students generally have a difficult time conceptualizing how the U.S. is divided into states (let alone where those states actually are) and how states are divided into counties. Playing Mystery Skype can be daunting for students who are unfamiliar with U.S. geography. Concepts such as regions, compass directions, and states physical relationships can sometimes confuse them.

I found it necessary to do a few activities to help my students become familiar with state names and locations. In Nevada U.S. geography is covered in 5th grade so I wasn't too concerned about them memorizing states and capitals, but I did want them to be familiar with state names and how to locate those states on a map. I used the following activities within the first few weeks, hopefully before our first Mystery Skype.

States and Capitals Interactive Notebook (free)

I love using interactive notebook so when I saw this idea I immediately wanted it. Unfortunately the blog author never responded to my request so I ended up creating my own. I found the perfect region maps on this teacher's website. Students use the foldable to identify the state and record the name, abbreviation, and capital. You can download the file here. Directions for cutting out and gluing into the notebook are on the first page.


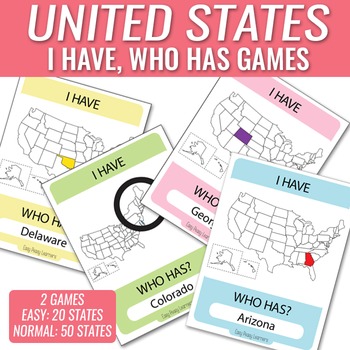
I Have, Who Has States Game ($3)

This is an easy to prepare game that helps students easily recognize the states and their shapes. My students loved it and asked to play it several times. Distribute state cards to each student and pick a student to start. That student reads the Who has (Arizona)? question at the bottom of the card. The student holding the card depicting Arizona stands up and asks their question. Play continues until all states have been played. This resource can be purchased from Teachers Pay Teachers.


Me On The Map ($6)

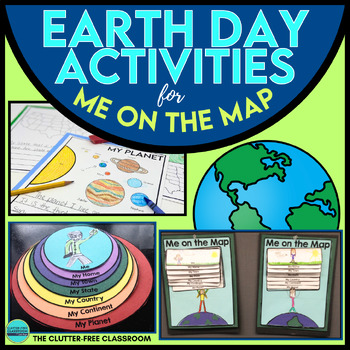
I found that my students had a hard time with the perspective of where our state is in relation to the rest of the nation and the world. This resource helped to bring terms like city, county, and state into perspective. The original was very generic and didn't have pictures of our state or our counties and city. So I provided my students with this file of maps specific to Nevada that they added to the respective sheet. The update resource can be purchased from Teachers Pay Teachers.


State Name Word Search (free)

This is a very DOK Level 1 activity, but I felt my students needed to become familiar with the state names in some way. So I used the worksheet generator at A to Z Teacher Stuff to create these word search worksheets. I let the students work in pairs to find all the states. You can download 3 different versions here, here, and here.


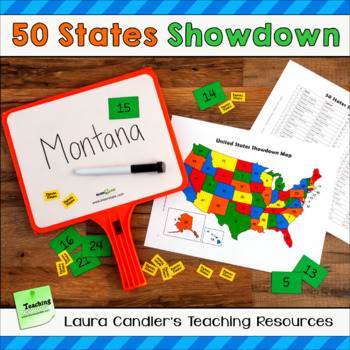
Find the States Showdown Game ($3.50)

I love everything Laura Candler does and this game was no exception. From her TpT store:
Find the States Showdown is a game for reviewing state names and locations, and it can also be used for reviewing state capitals and abbreviations. Students can play the game with the states in a single region, or play a challenge game with all 50 states. Find the States Showdown can be played as a whole class, or students can play it within cooperative learning teams.
You can purchase this resource from her Teachers Pay Teachers store.


These were the resources I used this year to prepare my students for Mystery Skype. What activities do you use with your classroom?

Read More »

Saturday, July 22, 2017

#mysteryskype interactive maps with mapchart.net

One of the necessary tasks when doing Mystery Skypes is to track which states your class hooks up with. In my classroom I put up a poster size map of the United States and strung little papers to each state we had Skyped with. Students referred to it often to determine what states we might still be Skyping with.

The problem with the poster was that it took time to update and could only be seen while in the classroom. Parents couldn't see it and neither could my admins. I looked for a few different digital solutions so I could post the same info on our class website. I finally came across mapchart.net, which turned out to be an easy-to-use solution and very useful for many other applications as well.

Mapchart.net is a mapping creation website. Its free and very simple. The user selects a map, color codes it, then exports the map as a jpg file that can be used anywhere. Map data can be saved and modified later.

The steps I outline here are the ones I used to create my Mystery Skype map, but the steps are the same for any map you want to create.

First click the United States drop down menu and select States.
The 3 easy steps to create a map are on the left side of the screen (or the bottom if it's a very wide map). Start with Step 1 and choose a Fill color. I selected only green because I only wanted to show one level of coloring (the states we Skyped with). If I were to compare different areas, regions of the United States for example, I would need to select multiple colors. There are other options to choose as well.
In Step 2 type a label for each color that appears on the map. Since I didn't want the user to be confused with the default color I added a label even though I was only using one color.
Step 3 is for downloading the map and saving it for later use. To download a jpg file click on Convert to Image and then Download. It saves a jpg you can use anywhere - class website, in Twitter, email, etc.
To save the map data to update later click on Save-Upload Map Configuration. On the next screen click the Save Map Configuration button and the map data is saved as a simple text file.
 
After the next Mystery Skype its time to update the map. Open the text file you downloaded earlier, copy all of the text, and paste into the bottom half of the screen shown above. Your earlier map configuration will appear and you can add the additional states or make whatever edits you need.

As you can see, this is an easy-to-use solution for tracking your connected states. I always sent out this updated map to the parents so they could be reminded of the friends we made during our Mystery Skype sessions. What methods do you use in your class?


Read More »

#mysteryskype recording book

Last school year I made it my goal to have my 4th graders Mystery Skype with all 50 states. We first Mystery Skyped the second week of school. Our last Mystery Skype was the second to last week of school. Unfortunately time and curriculum got in the way and we were not able to reach all 50. We did Skype with 21 different states and a few states multiple times. Here's a map of the states we made friends with.
We Mystery Skyped with all states in green.

Besides not Skyping with all 50 states, my only regret was not having the students research a little about each state after we met them. In Nevada the 4th grade social studies curriculum focuses on Nevada while the 5th grade studies the United States. Because of that I wasn't too concerned about it during the year, but in hind sight I think it would have helped students gain a national perspective by doing some simple research.

With that thought in mind I've created a template students can use to record basic state information. I created it in two different formats, depending on the resources available in your classroom. In both formats I created a cover page, a page with instructions for the students, and a template page that can be copied for each state.

In my class we had 1:1 iPads with Book Creator installed. The students absolutely loved using Book Creator and used any free time to create books. This would be a natural fit for them. The video shows what the 3 pages in my Book Creator template look like. You can download the ePub file used by Book Creator here. The elements on the template page are locked so students can't move/delete them. They can still double-tap inside the text box to change the text.


Since a lot of schools are using Google Apps for Education I decided to create this resource in Google Slides format as well. Slides doesn't have a way to lock elements, so students just need to be careful when clicking on elements so they don't accidentally move or delete them. The format is pretty much the same as the Book Creator one. You can make a copy of this template here.


If you use Google Classroom either format is super easy to distribute to your students. You can either attach the Book Creator ePub file which students would then save to their iPad in Book Creator. Or give them the URL to the Google Slides template and they'll be prompted to create their own copy.

Both templates are fully editable so you can change what information you want your students to collect. Whenever we did a Mystery Skype we asked the other class questions and my students always gravitated toward questions like:
  • name of the town
  • name of the school
  • school mascot
  • how many students in the class
My students also like to keep track of who guessed first. All of these might be fun to keep track of, although they aren't specific state information.

Let me know what you think of this resource or share ideas you use in your classroom.

Read More »

Friday, July 14, 2017

In search of best practices to teach coding to elementary students

image from The Scheme Team
For the 2017-2018 school year I will be working at Marzano Academy at Heard Elementary School. Marzano Academy is a brand new magnet school in the Clark County School District focusing on coding. While my official title is Humanities teacher, my focus will be teaching coding to the students in grades 1-5.

The first tasks I was given was to develop a scope and sequence for the coding program, define the materials needed, and plan activities and resources for students with a diverse set of coding skills. As I discussed these ideas with the admins we felt that all decisions would be guided by two main principals.
  • all students should be exposed to all coding platforms taught at the school
  • students need resources to continue their learning outside of class time
As I considered various coding platforms and activities I came up with a list of various coding platforms that I feel all students at Marzano Academy should be exposed to. These platforms, or environments, include Javascript (Kodable/Tynker/Code.org/Code Avengers), Scratch, robotics, HTML/CSS, and mobile app creation. Some coding environments, such as HTML/CSS, are too difficult for some grade levels and would not be taught in all grades. Others, such as robotics, would look completely different in younger grades than in the upper grades.

I love the idea of teaching students different coding environments because it exposes them to different skills, syntax, and applications for coding. For myself, I love working with HTML and CSS to design websites. If I weren't in education that might be a field of work I would pursue. If we were to focus on just robotics or Scratch, students would miss out on other environments that might appeal to them. 

Defining these different environments was the scope of our project. But creating a sequence becomes a little harder. In order to give ALL students the opportunity to work in ALL coding environments, I can see the curriculum taught in one of two ways.

In the first way students in each grade level would be exposed to each coding platform during an 8 week period. The structure might look something like the diagram below.


The pros for this would be:
  • students in all grade levels work in each coding environment
  • students are given multiple opportunities to work in each environment over their time at Marzano
The cons for this structure would be:
  • students would only scratch the surface of the coding environments
  • with limited time in each environment students wouldn't have time to apply their skills or create something of value
  • its hard to define how the coding experience would be different across grade levels. i.e. how does robotics look different from 4th to 5th grade? 
A second approach would be to assign coding environments to specific grade levels, as pictured below.

The pros for this would be:
  • students have more time to go in depth in each environment, experimenting and applying concepts and skills learned
 The cons for this structure would be:
  • students at the beginning of their time at Marzano would miss out on some coding environments. For example, under this model 5th graders would only learn how to create mobile apps and would miss out on robotics or working in Scratch.
  • designing enough engaging activities to keep the students interested in a platform for an entire year (approximately 34 weeks) 
In my quest to find coding resources I've found plenty of resources to teach coding. The following websites have a lot of potential and I'll probably end up blogging about them. They provide a variety of visual activities and games to help students understand coding syntax.
But there's not a lot out there that describes the best sequence for teaching coding to students.  What skills or platforms are better for younger students in grades 1&2? What about older students?

I'd love to hear your thoughts on this. Which approach above seems better to you? Or am I completely off base on these? Is there something I've missed or haven't considered?

Read More »