TouchCast is a free iPad app that teachers and students and students in most grade levels can use. Here is a TouchCast made by Lindsay Baker (@linzbaker), an educator from California. In this video she models many of the interactive video features available.
If the interactive part doesn't work, try viewing the video from the TouchCast website at https://www.touchcast.com/baker1123/heres_how_to_use_a_touchcast_in_your_classroom
TouchCast produces a channel called EduCasts that features the best educational TouchCasts being made. These videos will give you ideas of how other teachers and classrooms are using TouchCast. You can view them at http://www.touchcast.com/educasts/ along with lesson plans at http://www.touchcast.com/lessonPlan/
Getting started with TouchCast is easy. Sign up is free for both teachers and students, but does require an email address. Creating a touchcast is done in 5 steps:
1. Scripting and planning
Have students write out a script, planning what they want to say and allowing time (pauses) in the script for vApps to appear on screen and stay there for a few seconds.2. Filming
Launch TouchCast, make sure you are on the Cast Side, and tap the Start from Scratch theme.The Effects tab at the bottom of the screen lets you add filters, add guides to help line things up, and add Green Screen.
You can also add Whiteboards where you can annotate on the screen.
3. Editing video clips
All of the clips from filming are in the Projects tab. You can re-order the clips, trim them down, duplicate and add transitions. Put all the clips together in the order you want them to appear in the video. Once individual clips are merged into one large video, import the video back into TouchCast using the Start from Scratch theme again.4. Preparing interactive content
To add interactive content (vApps), tap the vApps button. Tap any of the apps to customize it and then tap Use. All selected vApps will appear in the vApp tray at the bottom of the screen, ready to use during the touchcast simply by tapping it. They can be positioned anywhere on the screen by dragging it, resized, and changing the options by tapping the gear icon. When everything is done be sure to save the project.5. Recording the touchcast.
Press the red Record button and start recording, adding the vApps as you go. Tap the Done button when you are finished and you can preview the touchcast. You can always go back and edit the video or the vApps.6. Exporting
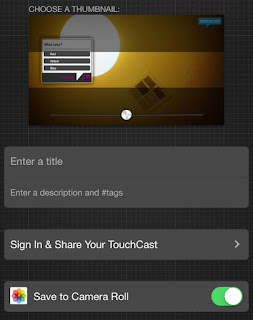
When everything is like you want, tap Export TouchCast, name the touchcast and press Save. When you are signed in to your account it will save to your TouchCast channel as well as giving you the option to save to the Camera Roll.There is a lot of power in this little app that allows you and your students to create some high quality videos. It seems to have a little learning curve and certainly requires some pre-planning (scripting), but I think students will enjoy working with it.
In my classroom this year, I plan on having a mini video studio set up in one corner of the room with green screen capabilities. Students will be able to use the iPads to create reports, screencasts, and other projects. I think TouchCast will be a great addition to this area.
Have you used TouchCast with your students? Let me know in the comments what you have done with it.


No comments:
Post a Comment