Thursday, February 7, 2019

Download 360 images

My 3rd grade classes have been learning about 360 videos. We've discussed how 360 videos help you feel like you are in a location and not just talking about it. We viewed a few 360 videos on YouTube, which still feels like you are watching a 2D video because you can still see the real world around you.

We then tried a few 360 images on our Oculus Go headsets using the Gala360 and 360 Stories apps. These were much better because with the headsets you can literally look all around you and see the new location. We liked this much better because it truly felt like we were there.

I now want the learners to create 360 experiences rather than just viewing them. We are using CoSpaces EDU to create our virtual worlds which we will be able to view on the Oculus Go headsets. We first needed 360 images (also referred to as equirectangular panorama) that can be uploaded into CoSpaces. Finding these images is actually very difficult. Most 360 images are captured by professional photographers and naturally have to be purchased.

One free resource I came across was through Flickr. These were pretty good, although it was hard to search for specific locations as opposed to just browsing through them. I also found some downloadable images at this website. The collection seems pretty nice, but the downloads are only panaroma photos and not true 360 (all around including above and below), which is what I wanted. There are also some great ones at PhotoPin website.

I also came across a great Google Chrome extension called Pano Fetch which downloads the full 360 images from Street View directly from the Google Maps page. I have been testing it out this week with the 3rd grade classes and it seems to work really well.

After installing the extension you'll see the yellow Peg Man icon in the Chrome toolbar. It will stay gray until you land on a location in Google Maps where there's a 360 image available to download, at which point it will turn yellow to let you know its active.


In Google Maps search for a location you want to view. In the description that appears on the left side scroll down to the Photos section and locate the photos with the 360 logo on it. That's the Street View that contains 360 images.


Some of these have been uploaded by web users rather than Google itself. The Pano Fetch app will only work with images uploaded by Google (I assume because of licensing or privacy issues).  If you are on a 360 image but Peg Man stays gray, then it was probably uploaded by a user. You can still find nearby Street View 360 images uploaded by Google by clicking the Street View map in the bottom corner. Blue lines indicate Street View and you can navigate to those areas.


Once you find the Street View 360 image you want to download, click the Peg Man extension button.  You can choose the quality from 1 (very low) to 5 (very high). The extension will download the images tiles and compose the equirectangular panorama and automatically download the final image. These images can be renamed and organized any way the learner wants.


For our purposes we can then log in to CoSpaces and upload the images as an environment. My idea is to have the learners collect a few 360 images, upload them as different scenes in CoSpaces, and then create a way to navigate between the scenes, including descriptions.


My initial experiments with this process worked flawlessly. We'll see how it works in a real classroom setting over the next few days.

Read More »

Thursday, December 20, 2018

Hour of Code

NOTE: A version of this blog post first appeared on the CUE-NV website.

Computer Science Education Week was held December 3-7 this year. It was started several years ago as a way to showcase the importance of learning computer science. It is held annually in December in honor of Admiral Grace Hopper, who was born on Dec. 9, 1906. Grace was a fantastic woman who accomplished much in the field of computing during her time with the Navy.

Code.org was asked to help out with CSEdWeek and introduced the concept of Hour of Code, relatively short coding activities anyone can do to learn code, even if they’ve never had any coding experience before.

At Lomie Heard Elementary School, A Marzano Academy, I teach coding to all students in all grade levels from 1st through 5th grade. Our school is a STEAM+Coding magnet school, so we embrace CS Ed Week and Hour of Code in a big way. Which is actually funny, because if I teach coding to all students every week anyway, why would we focus on Hour of Code?

To answer that question I met with @mstechie17 and @carr_8, two very supportive and creative facilitators at my school. We recognized that even at our school not all facilitators are comfortable with or even knowledgeable about coding. Not only that, but since I am the coding facilitator and already do coding with every single class, it’s easy for them to dismiss any coding activities as already covered by my classes. If all facilitators weren’t involved in some way, then coding would become a “side job” that learners continued to do in the silo of my class.

SNAC

To achieve our first goal of getting everyone involved we decided to model our Hour of Code after a favorite National Reading Week activity called Drop Everything And Read, or DEAR. DEAR involves selecting a specific time each day of the week when everyone in the entire building stops anything they are doing and reads for a designated amount of time. Everyone is involved: administrators, office staff, facilitators, etc. This activity creates a sense of community because everyone knows everyone else is involved in the same activity. It also highlights the importance of reading and the fact that everyone can do it.

The acronym we came up with for our coding version of DEAR is SNAC, which stands for Stop Now And Code (and snacks are kind of like small bites, which is a homonym for byte, which is related to coding - get it?). After selecting the designated times each day we created a list of resources teachers could choose from for their SNAC activity.

Facilitators were provided 3 options: unplugged activities, online options such as those found on the Hour of Code website, or have a guest speaker, which I’ll talk about in the next section. We gave facilitators time to explore the resources and choose what they wanted to do each day. These were recorded in a shared document for accountability reasons and so they could see what other classes were doing.

At the designated time each day an announcement was given over the PA system and then the magic happened! As learners came to me throughout the week for their regular classes, they were eager to share what they did in class.

Visitors

Our second goal was to inspire our learners and let them see what real jobs in coding look like. To accomplish that we needed programmers and game developers on campus. We reached out to a local developer Meetup group and asked any willing developers to sign up for a time to visit our classes. We provided a link to a Google Form to let us know when they were available, their area of focus, and to make sure we had any equipment ready for them.

As developers signed up we added their available days and times to another shared doc that facilitators used to sign up. In the end we had at least 6 different developers sign up to visit classrooms. Some developers spent several mornings visiting classes, others came only once or twice as their regular jobs allowed, and one even Skyped with a class instead of a physical visit.

All of our visitors were very excited to share their craft with our students and they were certainly received very well by our learners! I don’t know how much time was spent in preparation, but they all did a fabulous job with the classes. All of them have agreed to return again next year.

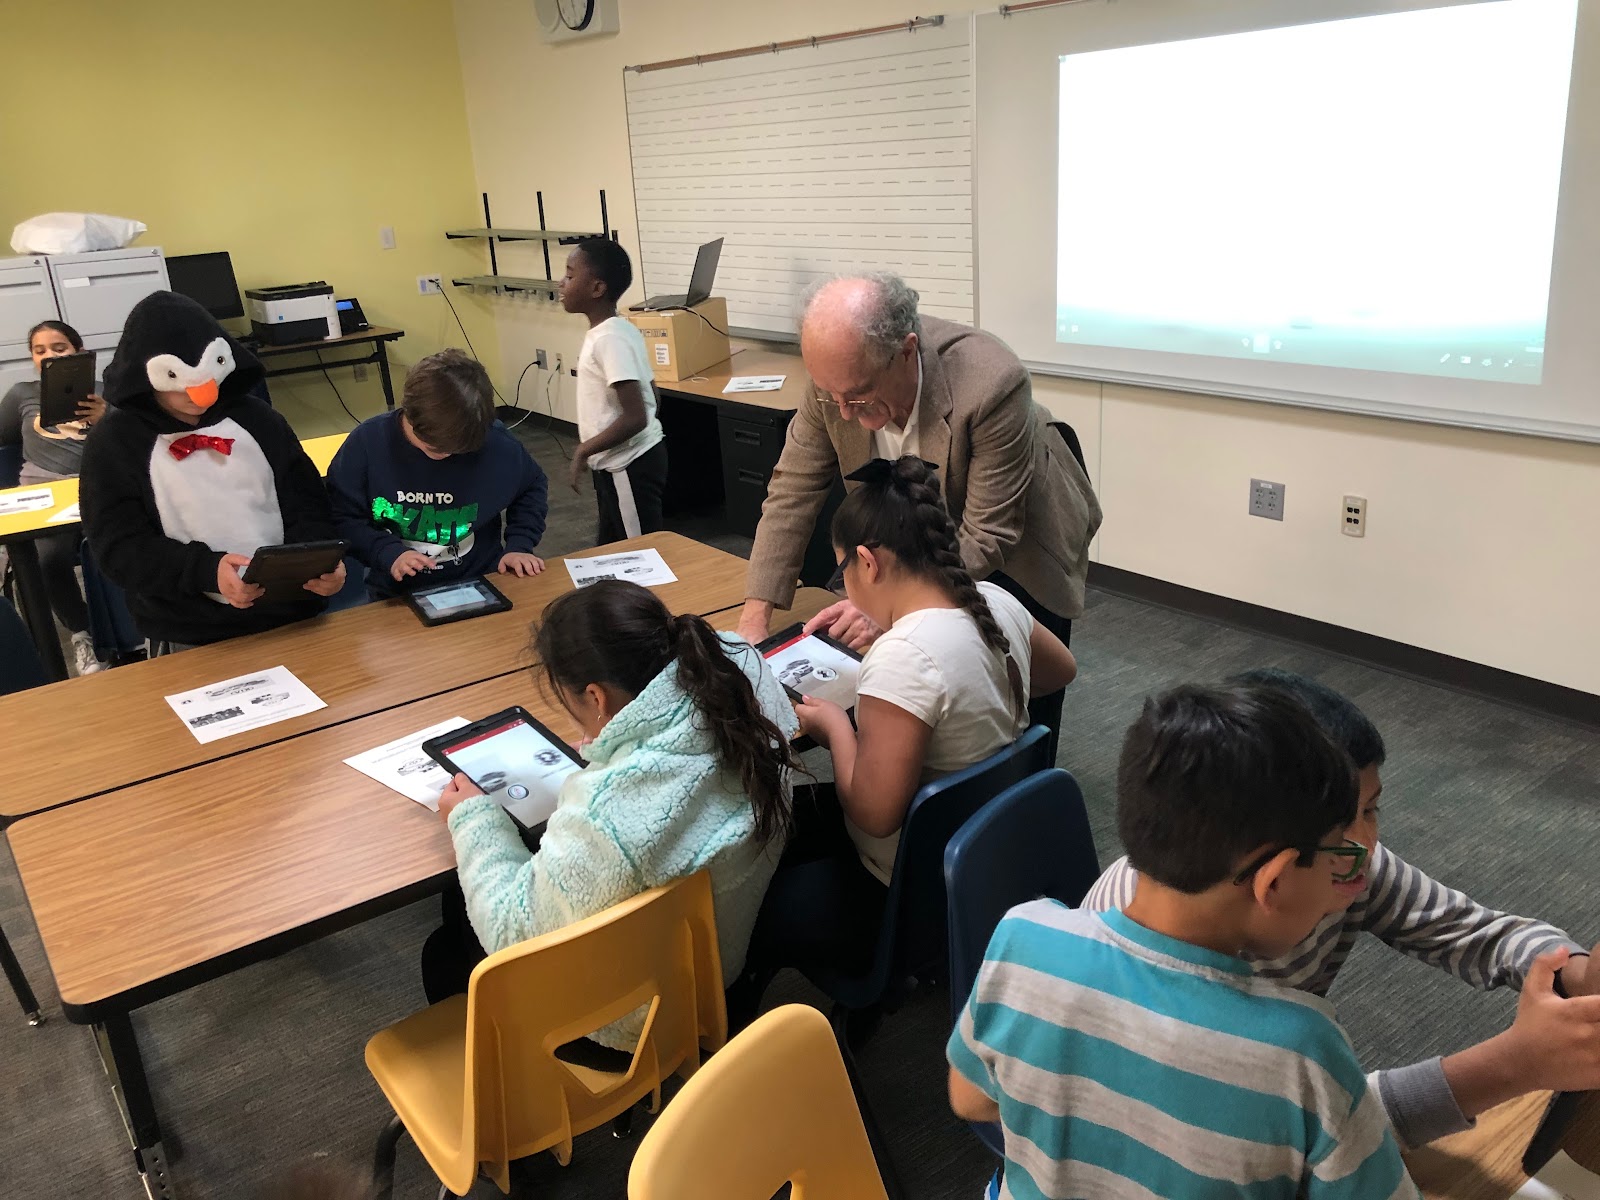
Ken Devellis showing Augmented Reality
Ken Devellis shows 4th graders how Augmented Reality works. 


Family </Coding> Night

Our final goal was to involve our families. One evening during the week we organized a Family </Coding> Night where we invited the families to visit the school and experience the same coding activities their learners experience and try their hand at coding. The idea was to make it as hands on as possible so the families could understand what their learners do each week.

We started the evening hearing from four different developers, who had 5 minutes each to share their story about coding. These developers signed up to present at our Family </Coding> Night by using the same Google Form. Each developer represented a different field and really showed learners and their families how successful developers could be. They excited and inspired the crowd.

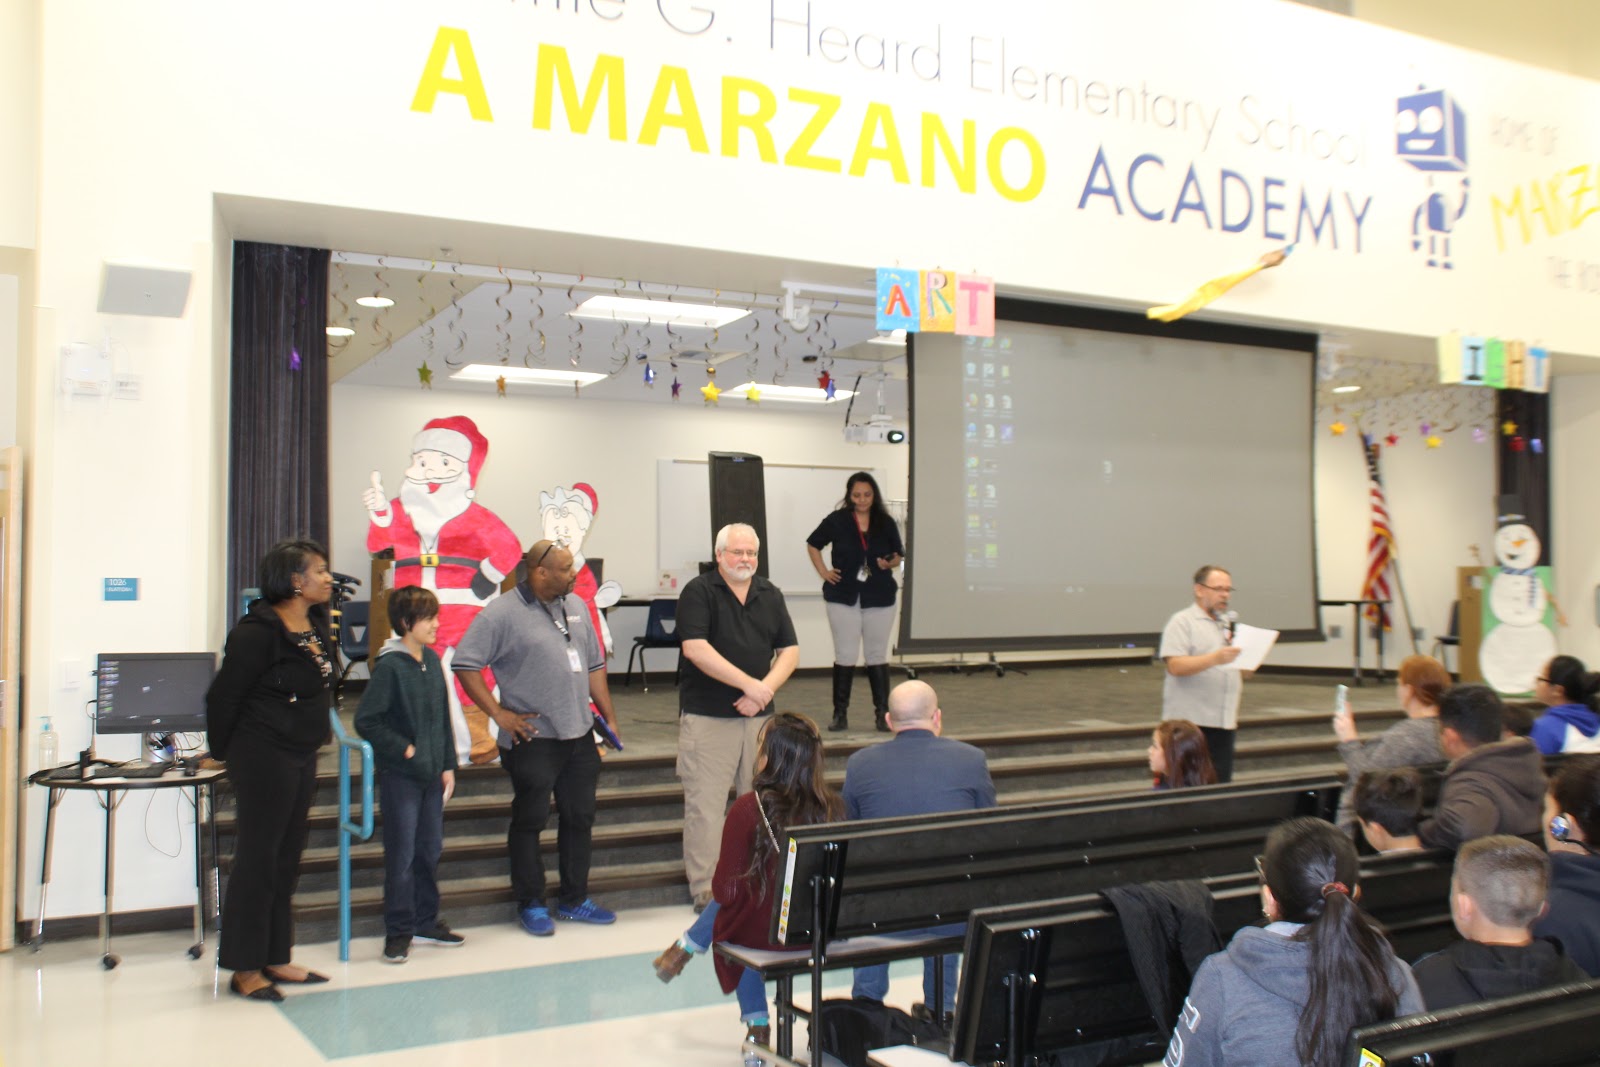
Presenters for our Family Coding Night.
Our presenters included Duana Malone, a mobile app developer, Zecharia, a 13-year-old game developer, Damond Pleasant, a web developer for lv.net, and Scott Stevens, an interactive specialist for Victory Hill Expeditions.

Families were then able to visit 6 rooms with different activities. During their weekly rotation to my coding class each grade level experiences a different coding environment from block based coding with Scratch, to text-based coding in HTML, to game development with Unreal Engine. We set up each room with a different coding activity representing each of these coding environments.

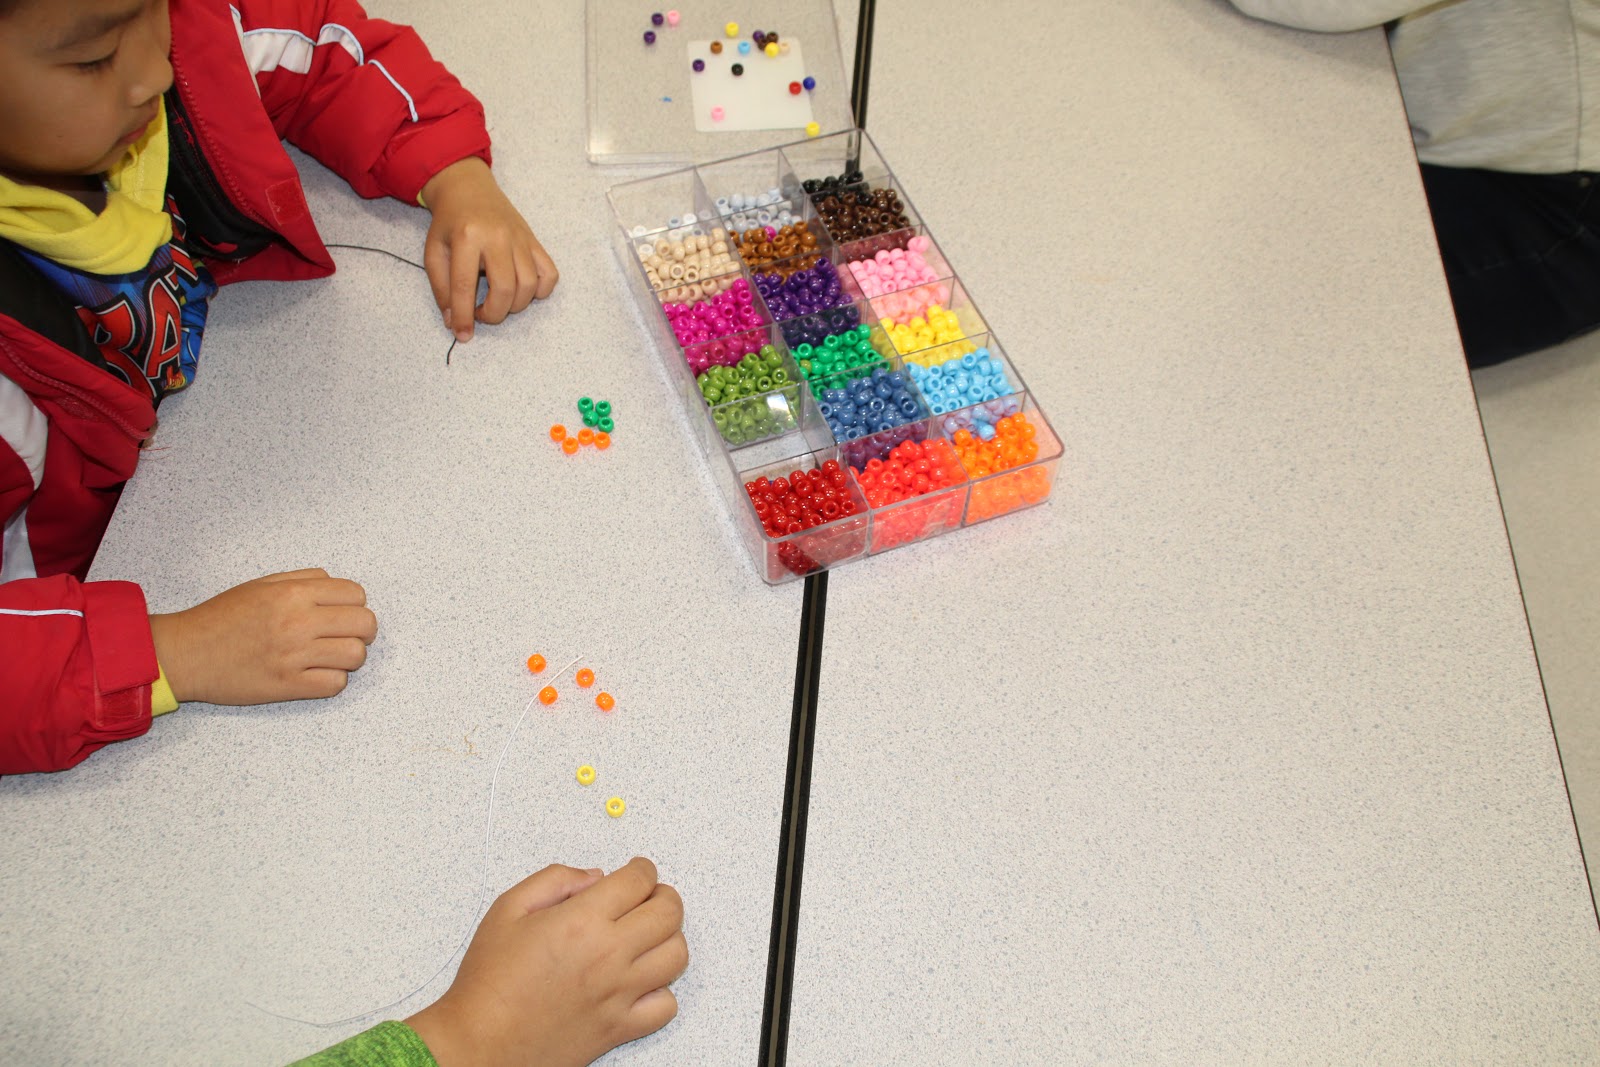
One room had unplugged activities from code.org such as Binary Bracelets, Dice Race, and Conditionals With Cards.

Binary Bracelet unplugged activity.

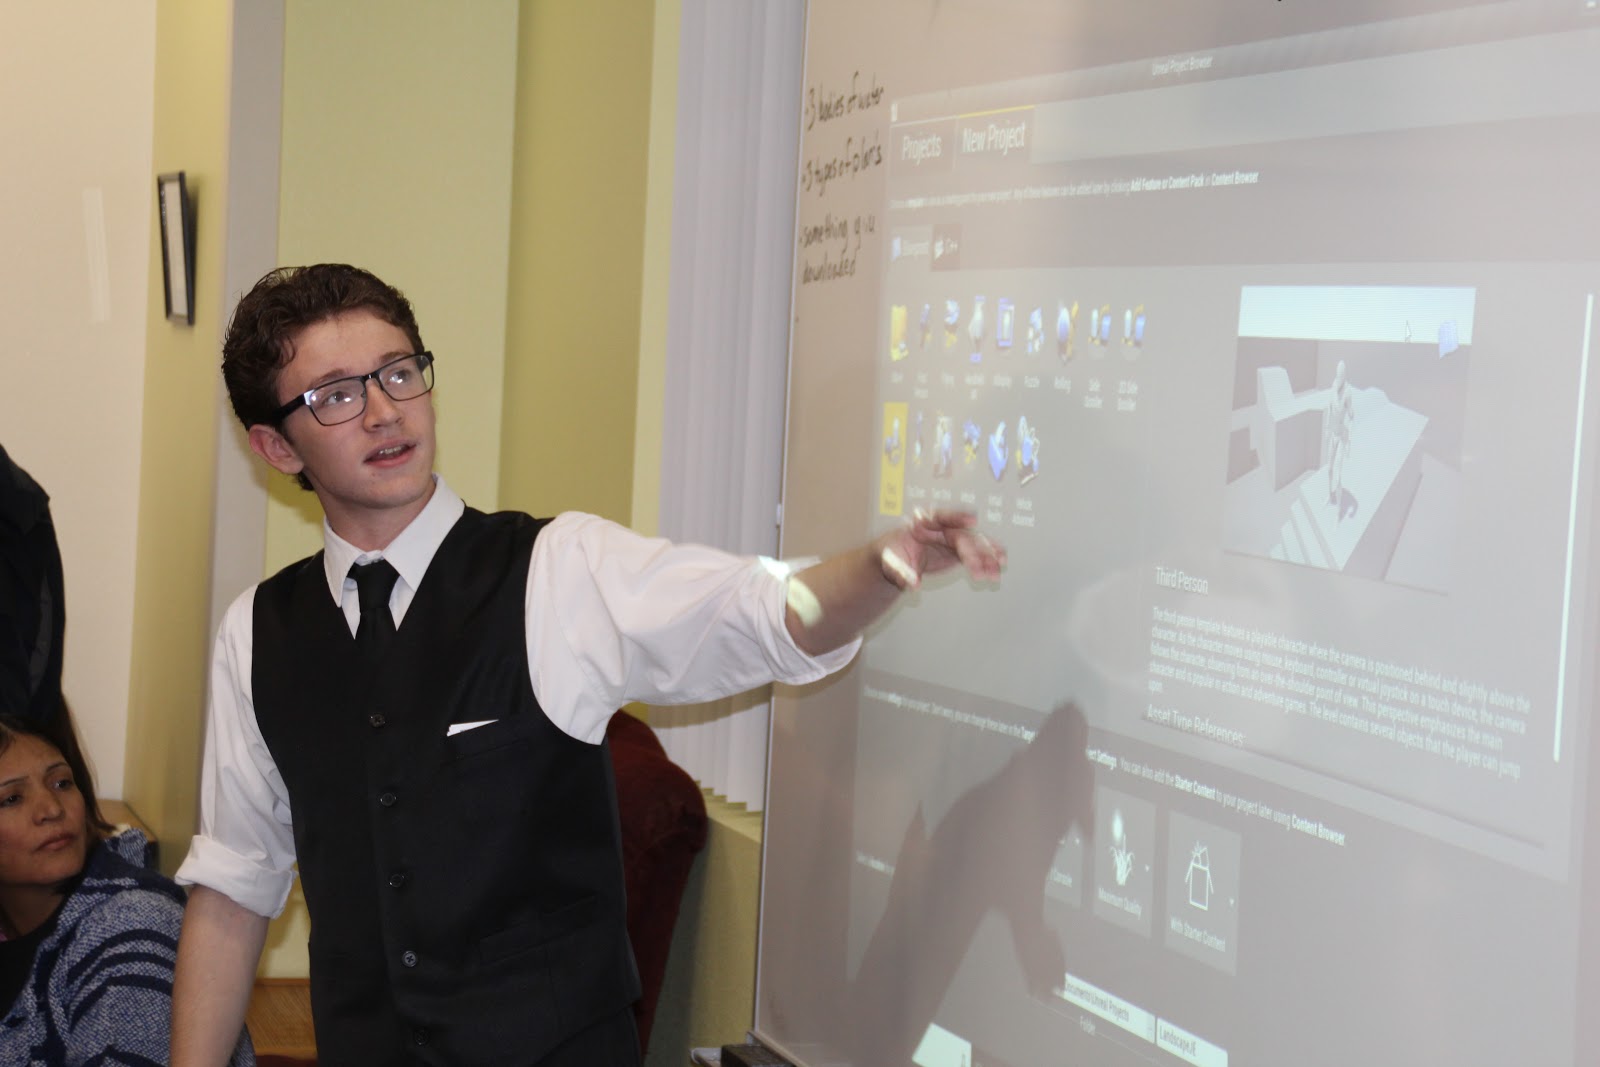
A teacher at the high school our school feeds into sent several of his students to our school to show how to use Unreal Engine. This is a coding platform our 5th graders are becoming familiar with.

Eldorado High School students teach Unreal Engine.

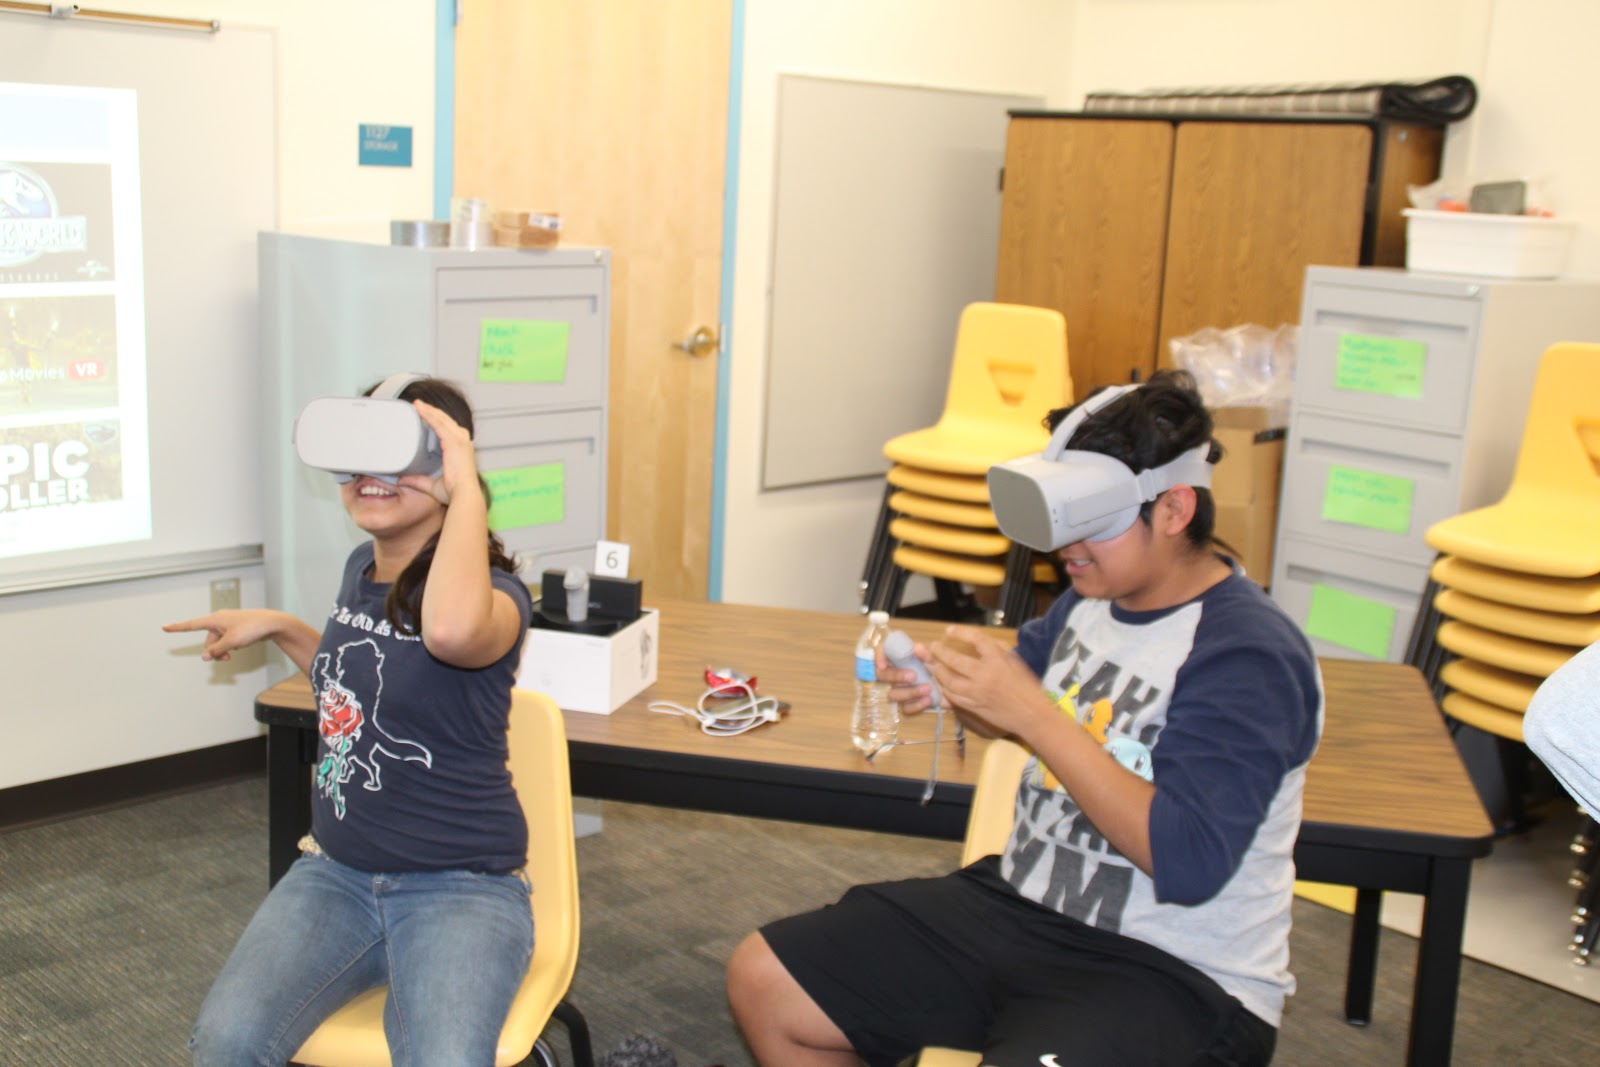
In another room families could try out our Oculus Go headsets. Our 3rd graders are learning how to create VR environments and this was the perfect opportunity for families to see what that was like.

Trying virtual worlds with Oculus Go headsets.

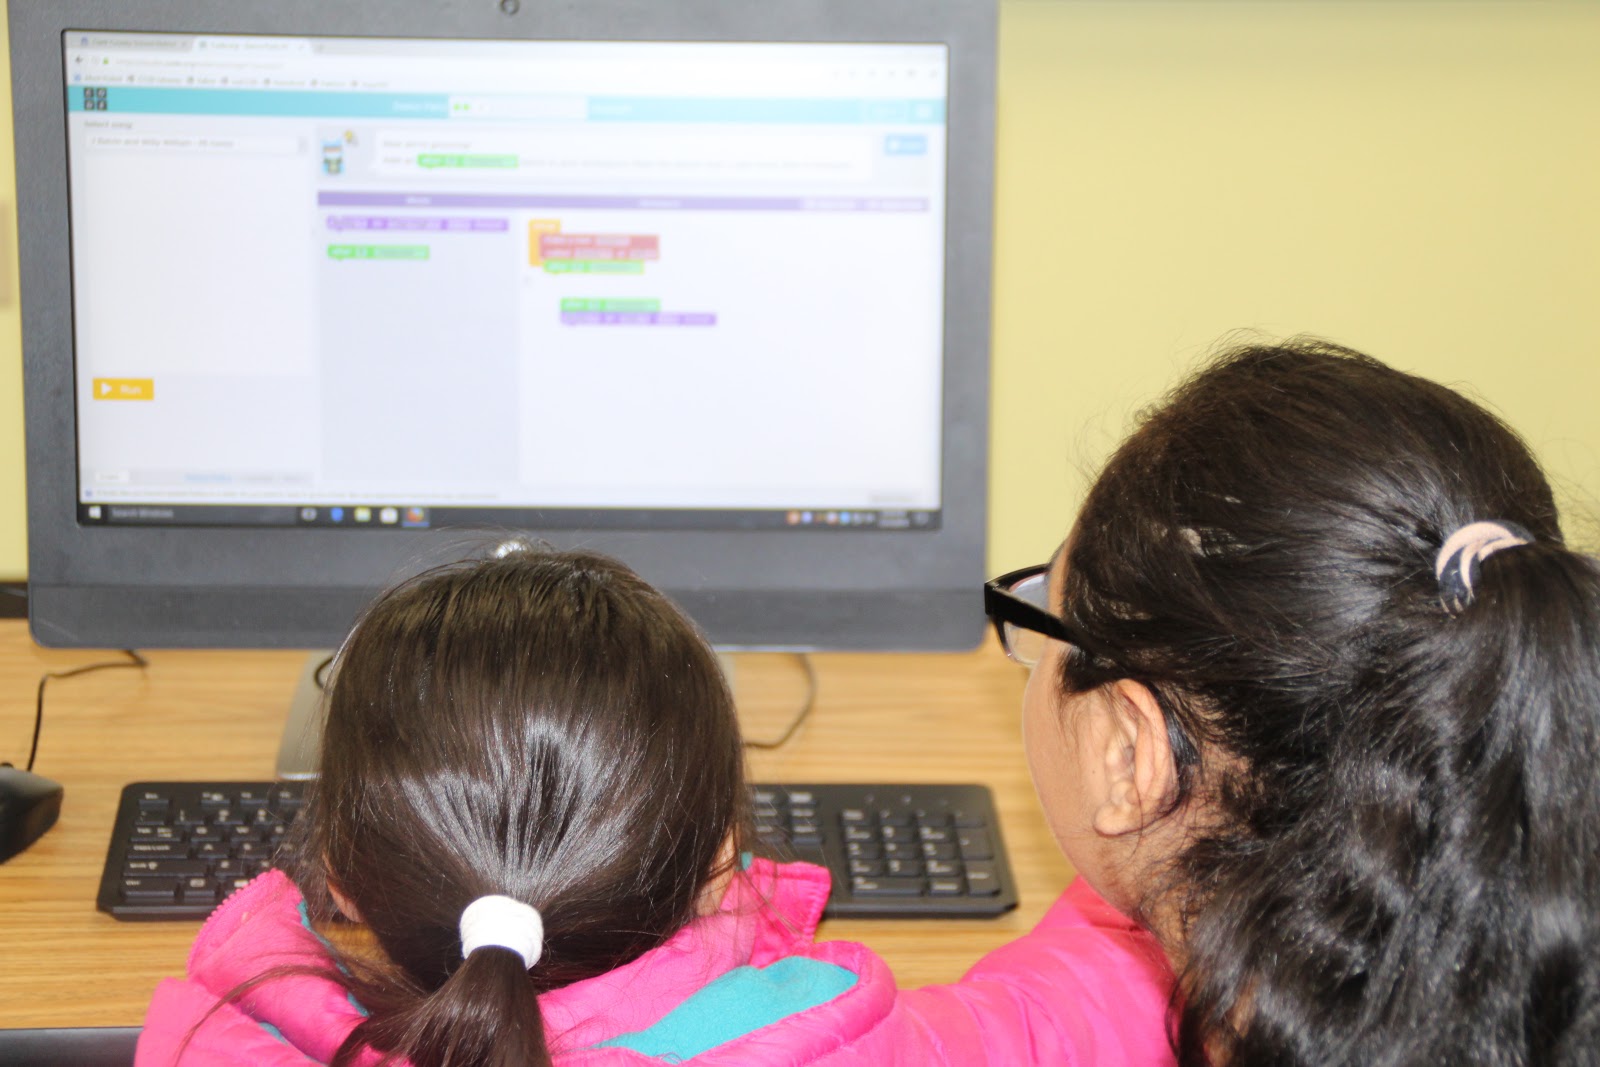
The fourth activity gave families the chance to code using Scratch, a block based coding language our 2nd graders are learning. We had Chromebooks available along with task cards with simple coding activities anybody could follow along and try.

Families tried their hand at Scratch programming.

A teacher at another local high school, Equipo Academy, heard about our event through the developer’s Meetup and asked if her high school students could help out. Since they had experience with Code.og we set them up in a computer lab where they ran several activities for families to try out.


Families learned how to use code.org.

In our final room families were able to try their hand at HTML, which our 4th graders are learning. We had a simple web page pulled up on each of the Chromebooks and families could change some of the values to see how that changed the web page.

Success

Each of our CSEdWeek activities brought our focus of coding to the forefront. There was lots of buzz and excitement around the school all week and it helped students experience coding in a variety of ways. The success of the whole week could be summed up by the thoughts of one parent at our Family </Coding> Night.

Towards the end of our Family </Coding> Night our principal was talking to one of the fathers and his learner about the presenters. She pointed out that the learner could one day grow up to be just like those presenters - successfully doing what they love. In reply the father said, “That’s why I drive 2 hours every day to bring my son to your school.”
Read More »

Wednesday, February 28, 2018

Storytelling with Toonastic 3D

There are a few apps that I absolutely love using with students. One of them is Toontastic 3D, a storytelling app that lets students animate and narrate their stories.  I wrote about it several years ago and included some graphic organizers and other resources I created then. Back then the app was super awesome. After Google purchased it, the app has only improved! It now supports scrolling backgrounds and 3D characters and settings.

The app works best on a touch device such as an iPad or Android tablet, but there is also a version available in the Google Play store that runs on select Chromebooks. I'm not sure how well the touch interface translated to a web-based version, but I've got students testing it out.

I recently used Toontastic 3D with 3-5 grade students in a weekly explorations class. After exploring the app and creating a very simple (beginning, middle, end) story, students used this template to develop a story following the 5 part story arc used by Toontastic. Students then spent several sessions narrating their stories and bringing their characters to life. Below are a few of the original stories students created.


Click the playlist icon (3 lines) to see more videos in this playlist

What went well

  • highly engaging - Students were very excited to use the app. They stayed on task and focused on telling their stories. Students that finished the required story early were eager to move on and create more stories.
  • ease of use - The first session we met I demoed the app, showing how to add a setting, characters, and record my voice. That was all I needed to do. Students dived right in and were able to show me a few tricks, like adding their own face to a character (that became a huge hit).
  • sharing - Students were motivated by their desire to share their story. When I first introduced the app I let them create a simple BME story and then played it to the class via AirServer on my laptop.
  • creativity - This is the reason I love apps like this. Its very open-ended, allowing the students to be creative. As you can see from the stories above, the stories varied widely.

What I want to fix

  • story development - The problem with engaging apps like Toontastic 3D is that students want to jump right in to the creation part without developing the story first. Usually they end up with a lot of sound effects and fights, but little story. This was a short 6 week course, meeting only once a week for 50 minutes. I tried having the students complete their stories at home so they would have more time in class to record, but they tended to forget their script and had to start over. If this were done in a regular classroom setting where I could stay on top of them, I'm sure the quality of the stories would go way up. 
  • best on a touch screen - Because of the way to manipulate the characters on the screen, this app is best used on a touch screen device like an iPad. Unfortunately at my school we are 1:1 with Chromebooks, so I had to scramble to get enough iPads for everyone. There is a version that can run on Chromebooks, but I could already see that the screen was smaller. I'm not sure how the well it will work for moving the characters.
  • voice volume - When it comes to recording their voice some students become very shy and talk softly. Plus there were a lot of us in the room so it was easy to pick up each other's voices. The best way to record your voice is with a headset, but I didn't have enough for everyone. You can tell the quality of the sound between those that used it and those that didn't.
Read More »

Sunday, July 23, 2017

#mysteryskype prep activities

Students generally have a difficult time conceptualizing how the U.S. is divided into states (let alone where those states actually are) and how states are divided into counties. Playing Mystery Skype can be daunting for students who are unfamiliar with U.S. geography. Concepts such as regions, compass directions, and states physical relationships can sometimes confuse them.

I found it necessary to do a few activities to help my students become familiar with state names and locations. In Nevada U.S. geography is covered in 5th grade so I wasn't too concerned about them memorizing states and capitals, but I did want them to be familiar with state names and how to locate those states on a map. I used the following activities within the first few weeks, hopefully before our first Mystery Skype.

States and Capitals Interactive Notebook (free)

I love using interactive notebook so when I saw this idea I immediately wanted it. Unfortunately the blog author never responded to my request so I ended up creating my own. I found the perfect region maps on this teacher's website. Students use the foldable to identify the state and record the name, abbreviation, and capital. You can download the file here. Directions for cutting out and gluing into the notebook are on the first page.


I Have, Who Has States Game ($3)

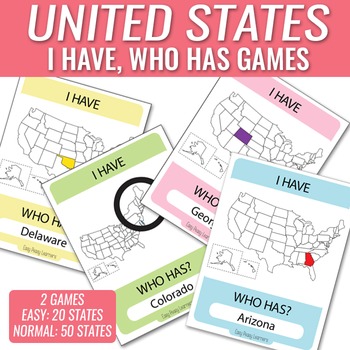
This is an easy to prepare game that helps students easily recognize the states and their shapes. My students loved it and asked to play it several times. Distribute state cards to each student and pick a student to start. That student reads the Who has (Arizona)? question at the bottom of the card. The student holding the card depicting Arizona stands up and asks their question. Play continues until all states have been played. This resource can be purchased from Teachers Pay Teachers.


Me On The Map ($6)

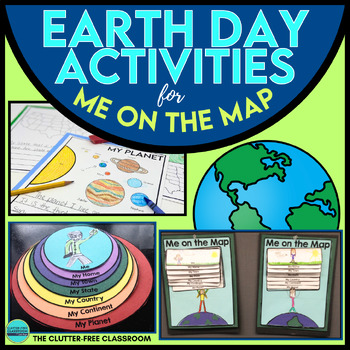
I found that my students had a hard time with the perspective of where our state is in relation to the rest of the nation and the world. This resource helped to bring terms like city, county, and state into perspective. The original was very generic and didn't have pictures of our state or our counties and city. So I provided my students with this file of maps specific to Nevada that they added to the respective sheet. The update resource can be purchased from Teachers Pay Teachers.


State Name Word Search (free)

This is a very DOK Level 1 activity, but I felt my students needed to become familiar with the state names in some way. So I used the worksheet generator at A to Z Teacher Stuff to create these word search worksheets. I let the students work in pairs to find all the states. You can download 3 different versions here, here, and here.


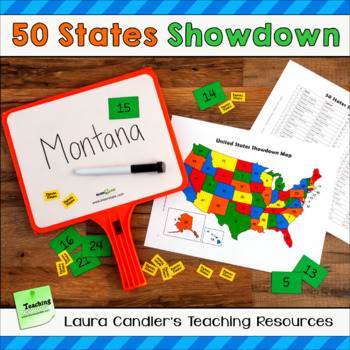
Find the States Showdown Game ($3.50)

I love everything Laura Candler does and this game was no exception. From her TpT store:
Find the States Showdown is a game for reviewing state names and locations, and it can also be used for reviewing state capitals and abbreviations. Students can play the game with the states in a single region, or play a challenge game with all 50 states. Find the States Showdown can be played as a whole class, or students can play it within cooperative learning teams.
You can purchase this resource from her Teachers Pay Teachers store.


These were the resources I used this year to prepare my students for Mystery Skype. What activities do you use with your classroom?

Read More »

Saturday, July 22, 2017

#mysteryskype interactive maps with mapchart.net

One of the necessary tasks when doing Mystery Skypes is to track which states your class hooks up with. In my classroom I put up a poster size map of the United States and strung little papers to each state we had Skyped with. Students referred to it often to determine what states we might still be Skyping with.

The problem with the poster was that it took time to update and could only be seen while in the classroom. Parents couldn't see it and neither could my admins. I looked for a few different digital solutions so I could post the same info on our class website. I finally came across mapchart.net, which turned out to be an easy-to-use solution and very useful for many other applications as well.

Mapchart.net is a mapping creation website. Its free and very simple. The user selects a map, color codes it, then exports the map as a jpg file that can be used anywhere. Map data can be saved and modified later.

The steps I outline here are the ones I used to create my Mystery Skype map, but the steps are the same for any map you want to create.

First click the United States drop down menu and select States.
The 3 easy steps to create a map are on the left side of the screen (or the bottom if it's a very wide map). Start with Step 1 and choose a Fill color. I selected only green because I only wanted to show one level of coloring (the states we Skyped with). If I were to compare different areas, regions of the United States for example, I would need to select multiple colors. There are other options to choose as well.
In Step 2 type a label for each color that appears on the map. Since I didn't want the user to be confused with the default color I added a label even though I was only using one color.
Step 3 is for downloading the map and saving it for later use. To download a jpg file click on Convert to Image and then Download. It saves a jpg you can use anywhere - class website, in Twitter, email, etc.
To save the map data to update later click on Save-Upload Map Configuration. On the next screen click the Save Map Configuration button and the map data is saved as a simple text file.
 
After the next Mystery Skype its time to update the map. Open the text file you downloaded earlier, copy all of the text, and paste into the bottom half of the screen shown above. Your earlier map configuration will appear and you can add the additional states or make whatever edits you need.

As you can see, this is an easy-to-use solution for tracking your connected states. I always sent out this updated map to the parents so they could be reminded of the friends we made during our Mystery Skype sessions. What methods do you use in your class?


Read More »

#mysteryskype recording book

Last school year I made it my goal to have my 4th graders Mystery Skype with all 50 states. We first Mystery Skyped the second week of school. Our last Mystery Skype was the second to last week of school. Unfortunately time and curriculum got in the way and we were not able to reach all 50. We did Skype with 21 different states and a few states multiple times. Here's a map of the states we made friends with.
We Mystery Skyped with all states in green.

Besides not Skyping with all 50 states, my only regret was not having the students research a little about each state after we met them. In Nevada the 4th grade social studies curriculum focuses on Nevada while the 5th grade studies the United States. Because of that I wasn't too concerned about it during the year, but in hind sight I think it would have helped students gain a national perspective by doing some simple research.

With that thought in mind I've created a template students can use to record basic state information. I created it in two different formats, depending on the resources available in your classroom. In both formats I created a cover page, a page with instructions for the students, and a template page that can be copied for each state.

In my class we had 1:1 iPads with Book Creator installed. The students absolutely loved using Book Creator and used any free time to create books. This would be a natural fit for them. The video shows what the 3 pages in my Book Creator template look like. You can download the ePub file used by Book Creator here. The elements on the template page are locked so students can't move/delete them. They can still double-tap inside the text box to change the text.


Since a lot of schools are using Google Apps for Education I decided to create this resource in Google Slides format as well. Slides doesn't have a way to lock elements, so students just need to be careful when clicking on elements so they don't accidentally move or delete them. The format is pretty much the same as the Book Creator one. You can make a copy of this template here.


If you use Google Classroom either format is super easy to distribute to your students. You can either attach the Book Creator ePub file which students would then save to their iPad in Book Creator. Or give them the URL to the Google Slides template and they'll be prompted to create their own copy.

Both templates are fully editable so you can change what information you want your students to collect. Whenever we did a Mystery Skype we asked the other class questions and my students always gravitated toward questions like:
  • name of the town
  • name of the school
  • school mascot
  • how many students in the class
My students also like to keep track of who guessed first. All of these might be fun to keep track of, although they aren't specific state information.

Let me know what you think of this resource or share ideas you use in your classroom.

Read More »

Friday, July 14, 2017

In search of best practices to teach coding to elementary students

image from The Scheme Team
For the 2017-2018 school year I will be working at Marzano Academy at Heard Elementary School. Marzano Academy is a brand new magnet school in the Clark County School District focusing on coding. While my official title is Humanities teacher, my focus will be teaching coding to the students in grades 1-5.

The first tasks I was given was to develop a scope and sequence for the coding program, define the materials needed, and plan activities and resources for students with a diverse set of coding skills. As I discussed these ideas with the admins we felt that all decisions would be guided by two main principals.
  • all students should be exposed to all coding platforms taught at the school
  • students need resources to continue their learning outside of class time
As I considered various coding platforms and activities I came up with a list of various coding platforms that I feel all students at Marzano Academy should be exposed to. These platforms, or environments, include Javascript (Kodable/Tynker/Code.org/Code Avengers), Scratch, robotics, HTML/CSS, and mobile app creation. Some coding environments, such as HTML/CSS, are too difficult for some grade levels and would not be taught in all grades. Others, such as robotics, would look completely different in younger grades than in the upper grades.

I love the idea of teaching students different coding environments because it exposes them to different skills, syntax, and applications for coding. For myself, I love working with HTML and CSS to design websites. If I weren't in education that might be a field of work I would pursue. If we were to focus on just robotics or Scratch, students would miss out on other environments that might appeal to them. 

Defining these different environments was the scope of our project. But creating a sequence becomes a little harder. In order to give ALL students the opportunity to work in ALL coding environments, I can see the curriculum taught in one of two ways.

In the first way students in each grade level would be exposed to each coding platform during an 8 week period. The structure might look something like the diagram below.


The pros for this would be:
  • students in all grade levels work in each coding environment
  • students are given multiple opportunities to work in each environment over their time at Marzano
The cons for this structure would be:
  • students would only scratch the surface of the coding environments
  • with limited time in each environment students wouldn't have time to apply their skills or create something of value
  • its hard to define how the coding experience would be different across grade levels. i.e. how does robotics look different from 4th to 5th grade? 
A second approach would be to assign coding environments to specific grade levels, as pictured below.

The pros for this would be:
  • students have more time to go in depth in each environment, experimenting and applying concepts and skills learned
 The cons for this structure would be:
  • students at the beginning of their time at Marzano would miss out on some coding environments. For example, under this model 5th graders would only learn how to create mobile apps and would miss out on robotics or working in Scratch.
  • designing enough engaging activities to keep the students interested in a platform for an entire year (approximately 34 weeks) 
In my quest to find coding resources I've found plenty of resources to teach coding. The following websites have a lot of potential and I'll probably end up blogging about them. They provide a variety of visual activities and games to help students understand coding syntax.
But there's not a lot out there that describes the best sequence for teaching coding to students.  What skills or platforms are better for younger students in grades 1&2? What about older students?

I'd love to hear your thoughts on this. Which approach above seems better to you? Or am I completely off base on these? Is there something I've missed or haven't considered?

Read More »

Monday, August 22, 2016

Summer EdTech Challenge #12: Student show offs

Welcome to the Summer EdTech Challenge! Summertime is a wonderful time to be a teacher! It's the perfect time to recharge your batteries, catch up on trends in education, read for pleasure, and learn new things. How about taking the opportunity to learn new tech skills or try out new tools and strategies?

Each Monday this summer I'll post a simple tech challenge, something you can do between dips in the pool and binge watching your favorite TV show. These challenges are practical, easy to implement ideas to help you develop your tech skills and start next year off on the right technology foot!

I am a firm believer in giving students choices when it comes to presenting what they know. For many years it seemed that teachers had students create PowerPoints as a way of sharing information. But there are so many options available today that provide a much better experience in creating and presenting. Many of these tools are free, work cross platform, and sync across websites and mobile devices.

I've blogged about many tools and have many favorites. Some tools are linear in nature, just like PowerPoint, while others allow the user to choose the order they consume the information. When we provide students with a variety of tools, they can pick the tool they like best for the task at hand. Some might prefer the visuals of Haiku Deck, while others want to make a quick video in PowToon or iMovie.

The table below provide links to my 9 favorite apps for student presentations. Some links will take you to my reviews, where available. The review may be just for the iPad app, but most also have a website that can be used on desktops, laptops, and Chromebooks. Other links will take you to other websites with more information. This list is by no means definitive - I'm still learning about great tools myself! You may want to check out Student Presentations: Moving Beyond PowerPoint for some other ideas and resources.

Linear
Haiku Deck Google Slides Prezi
Visual
ThingLink Spark Page Smore
Video
Spark Video iMovie PowToon

Your EdTech Challenge this week is to pick a presentation app, learn about it, and pick one of your learning activities where students will use that app. You are not limited to these 9 apps - let me know if you find another great one! Don't forget to come back to this post and let me know what app you picked and how your students will use it.

Read More »

Monday, August 15, 2016

Summer EdTech Challenge #11: YouTube Generation

Welcome to the Summer EdTech Challenge! Summertime is a wonderful time to be a teacher! It's the perfect time to recharge your batteries, catch up on trends in education, read for pleasure, and learn new things. How about taking the opportunity to learn new tech skills or try out new tools and strategies?

Each Monday this summer I'll post a simple tech challenge, something you can do between dips in the pool and binge watching your favorite TV show. These challenges are practical, easy to implement ideas to help you develop your tech skills and start next year off on the right technology foot!

YouTube was created by a few PayPal employees back in 2005 as a way to upload and share videos. During the summer of 2006, YouTube was one of the fasted growing sites on the web with 100 million video views per day in July. With YouTube only being 11 years old, that means students in elementary school and entering middle and high school don't know what the internet (and their life) was like without it! They are often referred to as the YouTube Generation or Gen C - the group that cares about creation, curation, connection, and community.

Enter the teacher. In order to engage students and bring relevance and meaning to their learning activities, videos can often be embedded within the lesson or used as a hook to get students interested. There are many ways YouTube can be used in the classroom - and not just as filler. Check out my post 7 ways to use YouTube in the classroom for some cool ideas.

Having trouble finding that perfect video? Check out my post Search YouTube like a boss! for tips on filtering out the cruft and easily finding the right video with the right content and right length. After searching through  YouTube you'll find that you want to curate your own video collections using playlists. Also following quality YouTube channels will help you keep on top of your favorite YouTube authors.

Your EdTech Challenge this week is to read through those blog posts about integrating YouTube. Then explore YouTube, finding videos, creating playlists, and subscribing to channels to supplement your classroom. Share in the comments what you've discovered. I'm always looking for interesting videos and YouTube channels to help with my teaching!


Read More »

Monday, August 8, 2016

Summer EdTech Challenge #10: Screenshot this!

Welcome to the Summer EdTech Challenge! Summertime is a wonderful time to be a teacher! It's the perfect time to recharge your batteries, catch up on trends in education, read for pleasure, and learn new things. How about taking the opportunity to learn new tech skills or try out new tools and strategies?

Each Monday this summer I'll post a simple tech challenge, something you can do between dips in the pool and binge watching your favorite TV show. These challenges are practical, easy to implement ideas to help you develop your tech skills and start next year off on the right technology foot!

Remember that saying "A picture is worth a thousand words"? When explaining concepts to students or modeling technology use, that little picture can help students tremendously. Screenshots can really transform the way teachers use technology. A screenshot is simply a picture of what you see on the screen of your device, whether its a computer, laptop, or iPad.

Teachers can also show students how to take screenshots, using this simple skill to hold students accountable. After students have solved a math problem, created a story map, or any digital task, they can take a screenshot and share it via email or uploaded to a class site such as Edmodo or Google Classroom.

iPad

Taking a screenshot on an iPad is as easy as pressing the home button and power button at the same time. The image is saved directly to the Camera Roll where it can be cropped and other basic edits performed.

Windows

Windows 10 users can press the PrtScn button on the keyboard. This takes a picture of the entire screen and saves it to the clipboard, which can then be pasted into any application. If you want a picture of just the active window then press Alt + PrtScn. If you'd rather save the screenshot as a file, then press the Windows logo key + PrtScn. The picture file will be saved to a folder called Screenshots inside your Pictures folders.

If you want more flexibility in the area to capture, use the Snipping tool. Snipping tool can take screenshots of an open window, rectangular area, a free-form area, or the entire screen. You can annotate your snips with different colored pens or a highlighter, save it as an image.

Mac

Macs have built-in screenshot capabilities that are simple to use - you just need to remember a few keystrokes. To take a screen shot of the entire screen, press Cmd + Shift + 3. The screen shot will be saved to the desktop and named Screenshot with the date and time added to the file name. To take a screen shot of just a specific area press Cmd +  Shift+ 4. The cursor will turn into a cross-hair that you can drag across the screen to select a window or other area. Letting go of the mouse will take the picture and save it to your desktop.

If you want to save the screen shot to your clipboard to paste into an application, add the Control key to either keystroke above. Control + Cmd + Shift + 3 for the entire screen or Control + Cmd + Shift + 4 for the crosshairs.

Jing

Jing by TechSmith is a free screenshot and screencast software that is compatible with Macs and Windows. Simply select any window or region that you want to capture, mark up your screenshot with a text box, arrow, highlight or picture caption, and decide how you want to share it.

Jing also does screencasting, which is a method of recording the action that happens on your screen. Select any window or region that you would like to record, and Jing will capture everything that happens in that area. From simple mouse movements to a fully narrated tutorial, Jing records everything you see and do. Jing videos are limited to five minutes for instant, focused communication.

This week's EdTech Challenge is to practice using some of these screenshot skills. Can you take screenshots of just a window or specific part of the screen? Can you save it as a file and import into a document? How about saving it to the clipboard and pasting it right into that document? After you've practiced a little bit, come back and tell me how you did. What ways do you think you and your students can use screenshots in your classroom?

Read More »

Friday, August 5, 2016

My technology integration goals for a new school year


iPad and school supplies
This school year I will be transitioning into a 4th grade classroom after about 15 years as a digital coach. Prior to my work as a digital coach I taught 4th grade for eight years. Over the course of my travels from school to school as a digital coach, I've met a lot of awesome teachers doing a lot of awesome things with their students. I've worked with many of them and explored many digital tools. Now I'm ready for my own classroom!

I'll be team teaching with a reading coach who will focus on ELA. I will teach math, science, and social studies for the other half of the day. Naturally I've done a lot of reflecting this summer on what I want to do with my students. I've thought long and hard about how I envision using technology as a tools to help my students. I've come up with this list that I don't feel I can compromise on. None of these digital tools or opportunities was available when I was in the classroom before, so I look forward to seeing what my students and I can accomplish with them.

Mystery Skype - I'm so excited to have my own class this year where I can do as many Mystery Skypes as I want! My goal is to Skype with all 50 states.

Global Learning - I've signed up to participate in Adventure16 and I want to investigate projects at Digital Explorer to find something for my students to participate in. I realize our social studies focus in 4th grade is Nevada, but I strongly feel that students should become global citizens as well. My goal is to find a global project we can team up with someone to work on and then find something local as well.

Interactive Notebooks - I'll be using Interactive Math Notebooks, but I want to explore adding a digital component with the goal of being a full digital interactive notebook next school year. Ideas I have are to use augmented reality with the printed version (links to demonstration videos, digital manipulatives and tools, etc) and explore something like Google Slides for full on digital notebooks next year.

iPad tools - I know I'll have at least 7-8 iPads in my room, but I hope to have a complete cart. Regardless, a few apps I want to have students use are Book Creator to create math books either as a digital portfolio or skill/unit based evidence of their learning. Explain Everything would be the perfect companion app for this project.

GAFE - students have full access to Google Apps for Education, so we'll be taking full advantage of those tools, including Google Classroom.

Blogging - I'm a strong believer in blogging so my students will definitely be using blogging as a way to reflect on their learning. I'll continue this blog with a focus on digital tools I discover and how we are using them in our class. Our class website will also have a blog as the home page to keep parents informed of our work.

Remind - speaking of keeping parents informed, I also plan on using Remind on a regular basis. I was on the parent end of it this summer with a non-school related event my kids were involved in and I absolutely loved it!

Websites - there are several websites that will be woven into our class work: XtraMath for math fact mastery, explore typing.com to increase keyboarding skills, GoNoodle for those important brain breaks, and EdPuzzle to hold them accountable for videos we see.

Plickers - our school has CPS Responders but I don't really like them. I'm going to use Plickers instead, which I think will give me a lot more flexibility and power with my formative assessments.

Presentation tools - I am big on teaching students proper presentation skills and giving them a variety of tools to demonstrate their learning. I also can't stand PowerPoints, so instead we'll learn how to use powerful tools like ThingLink, Haiku Deck, and Adobe Spark.

Video making - I will have a green screen station set up in the corner for students to create videos to demonstrate knowledge and learning. I'll have Do Ink's Greenscreen to integrate with the other video and picture apps.

Augmented Reality - I mentioned using AR with interactive notebooks, but I really want to explore using AR in a variety of other scenarios as well. I'll need to explore a few apps and see real case uses in the classroom.

Whew! Now that I look back at that list I see a lot of fun this year! I don't think I've bitten off too much, because a lot of this will integrate well with our curriculum. I always love to see real use examples from other classrooms. Please share your ideas and tech integration goals with me in the comments below!
Read More »

Monday, August 1, 2016

Summer EdTech Challenge #9: Tech it up with SAMR

Welcome to the Summer EdTech Challenge! Summertime is a wonderful time to be a teacher! It's the perfect time to recharge your batteries, catch up on trends in education, read for pleasure, and learn new things. How about taking the opportunity to learn new tech skills or try out new tools and strategies?

Each Monday this summer I'll post a simple tech challenge, something you can do between dips in the pool and binge watching your favorite TV show. These challenges are practical, easy to implement ideas to help you develop your tech skills and start next year off on the right technology foot!

This series of edtech challenges (and this blog) has been designed to introduce teachers to innovative ways of using technology in their classroom. Classroom technology is ubiquitous, but needs to be integrated properly in order to be effective. The use of technology needs to positively impact student teaching and learning. This is where the SAMR technology integration model can help.

SAMR is a model developed several years ago by Dr. Ruben Puentedura as a way for teachers to examine their use of technology. As the use of technology moves up through the SAMR levels, the technology becomes more integrated and necessary to the learning task. Check out this short video for an explanation of the SAMR model.


Once you understand the changes necessary to move from level to level, you can start examining your own technology practices. As you do so, remember that the goal is not to always strive for Redefinition. Its okay to have learning activities at the Substitution level. Instead, teachers to need to examine the activity and determine if the outcomes would be improved by moving up the SAMR levels. In other words, examine the level of student engagement-who is asking the important questions.  As one you move up the levels, computer technology becomes more important in the classroom but at the same time becomes more invisibly woven into the demands of good teaching and learning.

Check out 8 Examples of Transforming Lessons Through the SAMR Cycle for some specific examples of using the SAMR model to improve some typical classroom learning activities.

The EdTech Challenge this week is to take an existing lesson or project and redesign it so it moves up from the S or A level to the M or (even better) R level. Remember the definition of what makes it Modification or Redefinition.

After you've redesigned the task, come back to this post and describe the original task and how you changed it.

Read More »

Monday, July 25, 2016

Summer EdTech Challenge: #8: It's a small world!

Welcome to the Summer EdTech Challenge! Summertime is a wonderful time to be a teacher! It's the perfect time to recharge your batteries, catch up on trends in education, read for pleasure, and learn new things. How about taking the opportunity to learn new tech skills or try out new tools and strategies?

Each Monday this summer I'll post a simple tech challenge, something you can do between dips in the pool and binge watching your favorite TV show. These challenges are practical, easy to implement ideas to help you develop your tech skills and start next year off on the right technology foot!

The world is becoming a very small place. With today's technologies we can watch events unfold as they happen, communicate with experts in other countries and continents, and visit places we wouldn't be able to otherwise. It's actually a pretty small world out there and teachers have the opportunity to give students unique global experiences.

Through these global experiences students can learn that:
  • they are part of something bigger
  • the world needs to be taken care of
  • the world is (figuratively) flat
Here are a variety of ways you can bring the world into your classroom.

Mystery Skype - this is a fun country- or globe-trotting game where students connect with a class in another location with each trying to guess the location of the other using yes or no geographic type questions. I've played this game with classes in second grade up to high school. We've connected with classes in nearby states as well as New Zealand, Canada, and Venezuela. Younger grades can do a Mystery Number type activity, while older grades could do a Mystery Book or Mystery Element for science classes.

Skype - while Mystery Skype is one of my all time favorite activities, Skype can be used for much more than that. Microsoft's Skype in the Classroom site has many activities classes can do via Skype. Bring in an author to discuss their books or the writing process, connect with a zoo to learn more about animals, follow an expedition to the north pole, or bring a content expert into your classroom.

Global Read Aloud - read a book out load to your students during a set 6 week period. During that time make connections with other classrooms around the globe that are reading the same book. The depth of the project and the tools used (Skype, Edmodo, Twitter, etc) are up to the teachers. There are books to choose for all grade levels, including kindergarten.


Adventure 2016 - participate in the world's largest cultural exchange on November 17. Classrooms around the world will connect online that day to share what its like to be child in their part of the world.

The Global Classroom Project - is a rich resource for finding new ways to connect, share, learn and collaborate globally. You can find all kinds of projects to collaborate on with classrooms in over 35 countries. You come up with the project and use this site to advertise and connect with others.

Kid World Citizen - this website is a treasure trove of resources to help your students become global citizens. There are games, recipes, music, art projects, and even service projects that can be done locally or globally. You can search by country or topic such art, food, language, or celebration.

Digital Explorer - this site is about more than just making global connections. This site provides rich, curriculum-based resources to help connect students with explorers and scientists to learn about and solve global problems. This site provides real world ways for your students to get involved with global problems and solutions.

Since I am returning to the classroom this year as a 4th grade teacher I am committed to doing Mystery Skypes with my class. My goal is to Skype with a class from all 50 states. I've also signed up to do participate in Adventure 16. I'm going to explore some of the resources on the Digital Explorer site to find one my students can get involved with.

The challenge for this week is to explore the global education resources above and sign up for one for the upcoming school year. These are just a sample of projects and sights available. Feel free to do a web search for other resources and find one that appeals to you. The challenge is to become a global educator and help your students become global citizens. Let me know in the comments what you discover and commit to!

Read More »

Monday, July 18, 2016

Summer EdTech Challenge #7: Interactive videos

Welcome to the Summer EdTech Challenge! Summertime is a wonderful time to be a teacher! It's the perfect time to recharge your batteries, catch up on trends in education, read for pleasure, and learn new things. How about taking the opportunity to learn new tech skills or try out new tools and strategies?

Each Monday this summer I'll post a simple tech challenge, something you can do between dips in the pool and binge watching your favorite TV show. These challenges are practical, easy to implement ideas to help you develop your tech skills and start next year off on the right technology foot!

Our students live in a video filled world. YouTube is the 2nd largest search engine, with 3 billion searches per month and 6 billion hours of video viewed every month. They say a picture is worth a thousand words (see what I did there?), so what is a video worth in your classroom? Videos engage students in the content, set the stage for a lesson, reach more visual modalities, take students places they may never get to, and help them visualize complex concepts.

The biggest problem with using video, especially when assigned as individual assignments, is holding students accountable for what they view. While video is easy to link to or embed, its much harder to make sure students watch a clip in its entirety, don't get distracted by "related videos", or get lost on the world wide web, let alone understand the concepts we wanted them to master from the video.

This post originally started out with the idea of encouraging teachers to look at three really good options for embedding questions into videos as a means of holding students accountable. Unfortunately a post came across my Twitter feed announcing that Zaption was shutting down in September.
As far as I can tell this leaves only two options: EDpuzzle and PlayPosit (formerly known as EduCanon). I tried looking at a third option, Vizia, which is a super simple version of the same idea. But I just couldn't get it to work. The videos took forever to load and when I went to preview it after embedding questions the video never loaded. I'm hoping the developers continue to work on it because it was super simple to use and I love having options.

So now we are down to two options, unless someone leaves me a comment with other ideas. Both of these platforms allow you to import video from a variety of sources (YouTube, Vimeo, Khan Academy, LearnZillion, TedTalks, etc), clip the section you want, and embed multiple choice and free response questions. These interactive videos are then assigned to students. Both offer Google Classroom integration, making it easy to create classes and student accounts. Students then view the video and are stopped at teacher determined points to answer questions. Students cannot advance through the video until the questions are answered. Pretty slick way to hold students accountable!

Your challenge this week is to create an interactive video for your class to use next year. If you need some ideas of how you can use video, check out my blog post 7 Ways to Use YouTube in the Classroom. Then read my reviews on these two platforms (linked in the images below). Each has their own strengths and weaknesses, as well as a different interface. You'll need to try them out to see which one you prefer.


After deciding on a platform, create an interactive video to use in your class. Let me know in the comments how you plan to use the video. Was it difficult to embed the questions? What do you see is the value of a tool like this?

Here is an example of an interactive video I created for a 5th grade class using EDpuzzle.

Read More »

Monday, July 11, 2016

Summer EdTech Challenge #6: Formative Assessment tools

Welcome to the Summer EdTech Challenge! Summertime is a wonderful time to be a teacher! It's the perfect time to recharge your batteries, catch up on trends in education, read for pleasure, and learn new things. How about taking the opportunity to learn new tech skills or try out new tools and strategies?

Each Monday this summer I'll post a simple tech challenge, something you can do between dips in the pool and binge watching your favorite TV show. These challenges are practical, easy to implement ideas to help you develop your tech skills and start next year off on the right technology foot!

Formative assessment is a process used by teachers and students during instruction that provides feedback to adjust ongoing teaching and learning to improve students' achievement of intended instructional outcomes. It is a tool most teachers use to determine where the learning needs to go, whether students are understanding content or if more time needs to spent on certain skills before moving on. Check out this short video on formative assessment by Dylan William, a leading educational expert on formative assessment.


Luckily for teachers, there are many digital formative assessment tools out there. Digital tools offer many advantages over traditional paper and pencil type assessments. The biggest advantage is the ability to collect and analyze data instantaneously. As soon as students have answered a question or completed an assessment, it's graded and teachers have the data necessary to gauge the next direction in learning. No longer do teachers need to wait until after school to grade them and analyze the data. The data is permanent and can be reviewed at any time. In most cases it can be downloaded as a spreadsheet where teachers can further manipulate and analyze the data.

In addition to the quick access to data and results, digital tools offer these benefits:
  • make student thinking visible
  • provide efficient and immediate feedback
  • increase human interaction and debate
  • increase classroom participation and attentiveness
  • encouraging risk-taking with anonymous student responses
There are a variety of digital tools out there that can assess in a variety of ways, depending on the type of data the teacher is trying to collect. I believe that teachers should be familiar with a variety of digital tools, so they can be used in a variety of situations. Here is a list of some tools that are great for collecting real-time polling/survey data and student feedback regarding the concepts/ideas required to reach learning objectives.

Poll Everywhere is great for BYOD classrooms. Students can use their own cell phone, regardless of whether it is a smartphone or not. One feature I love about Poll Everywhere is the ability to collect words or phrases and display them as a word cloud.

Socrative is a good old standby for formative assessment tools. Teachers can ask multiple choice and true/false type questions that can include images. It has an iPad app for both teachers and students, but can also be accessed via the web. Many teachers have created Socrative quizzes and share them freely on the web.

Quizzez
Kahoot and Quizizz are game-based response systems. Students compete individually or in teams and earn points based on how quickly they can answer the questions. The game-based aspect of these systems is highly motivating and engaging for students. They are web-based so students can use any web enabled device such as a tablet, phone, or computer.

GoFormative lets you to upload an assignment in the form of some text, images, videos or a document.  Choose how you want to assess it, typed response, multiple choice or show your work. Assign it to you learners and watch live as they go through it. Students can type, show their work with drawings or submit images and you can see how all the learners are doing live.

Student responders such as CPS and Activotes are common in many classrooms and schools. Teachers can easily use them for polls and quizzes during lessons. They are easily set up, reliable, and don't require any additional tools beyond the software installed on the teacher's workstation.


Plickers are a good solution for classes that don't have access to classroom responders. Teachers print out QR Code style forms and use their cell phone to "poll" the classroom. This is a nice solution because students don't need a device in order to participate.

Your challenge this week is to become familiar with one of these digital formative assessment tools or select one of your own that you've heard of. Take one of the quizzes that you would normally use in class and recreate it using the tool you selected. Have it all ready to use in class this upcoming school year.

In the comments below let me know which tool you selected and why. Don't forget to tell me about the quiz you made - what you are trying to assess and how it fits into your curriculum.

Read More »