Sunday, February 15, 2015

Awesome iPad App: PuppetPals

There are many digital storytelling apps for iPads out there. One of my favorites is Puppet Pals 2, which lets students use digital puppets to tell their stories. Students can import their own pictures and backgrounds for unlimited creativity. When students touch a puppet and speak, the character's mouth moves. Students can even move individual limbs and joints on any of the puppets. The creativity with this app is unlimited!

Puppet Pals 2 is a digital storytelling app. Students choose a setting, puppet characters, rides for their puppets and appropriate background music for their story. Once the stage is set, students move the puppets with their fingers while narrating their story. Finished videos can be exported to the camera roll.

Puppet Pals 2 is free from the iTunes App Store. A Full-Access Pass with access to all settings, puppets and rides is available for $9.99. Using Apple's VPP schools can get it for half that price.

Students begin using the app by setting up the stage with a setting and characters. When everything is ready, they press the record button and start narrating their story.

1. Select a location or choose Photos and import their own photo as a background.


2. Select Characters.


3. Select a Ride for their characters.


4. Select appropriate background music.


Create their own custom character by switching heads and bodies. They can even take a picture of themselves and add their head to one of the bodies!

5. After the scene is set up, students tap the record button and begin narrating their story. They can use their fingers to move the puppets or their joints around the scene.

6. Once the recording is done they can preview their video or save it.

7. Finished videos can be exported to the Camera Roll and transferred off the iPad, if desired.

Integration Ideas

  • Students create a cartoon that highlights the major conflict in a work of fiction.  The characters have to use dialogue to explain the major obstacles that are being faced within the story.
  • Create short instructional videos in any learning area.
  • Create natural sounding dialogues to be incorporated into written works.
  • Take snapshots of main character or events in a story, use them to retell or create a new ending.
  • Use student photos or characters to act out story problems.
  • Use the historical characters and photos from the internet to tell a story from history.
  • Create any original short story and act it out using the characters.

Download my Tech Integration Challenge for Puppet Pals 2 and see if you are up to the challenge!
Read More »

Thursday, February 12, 2015

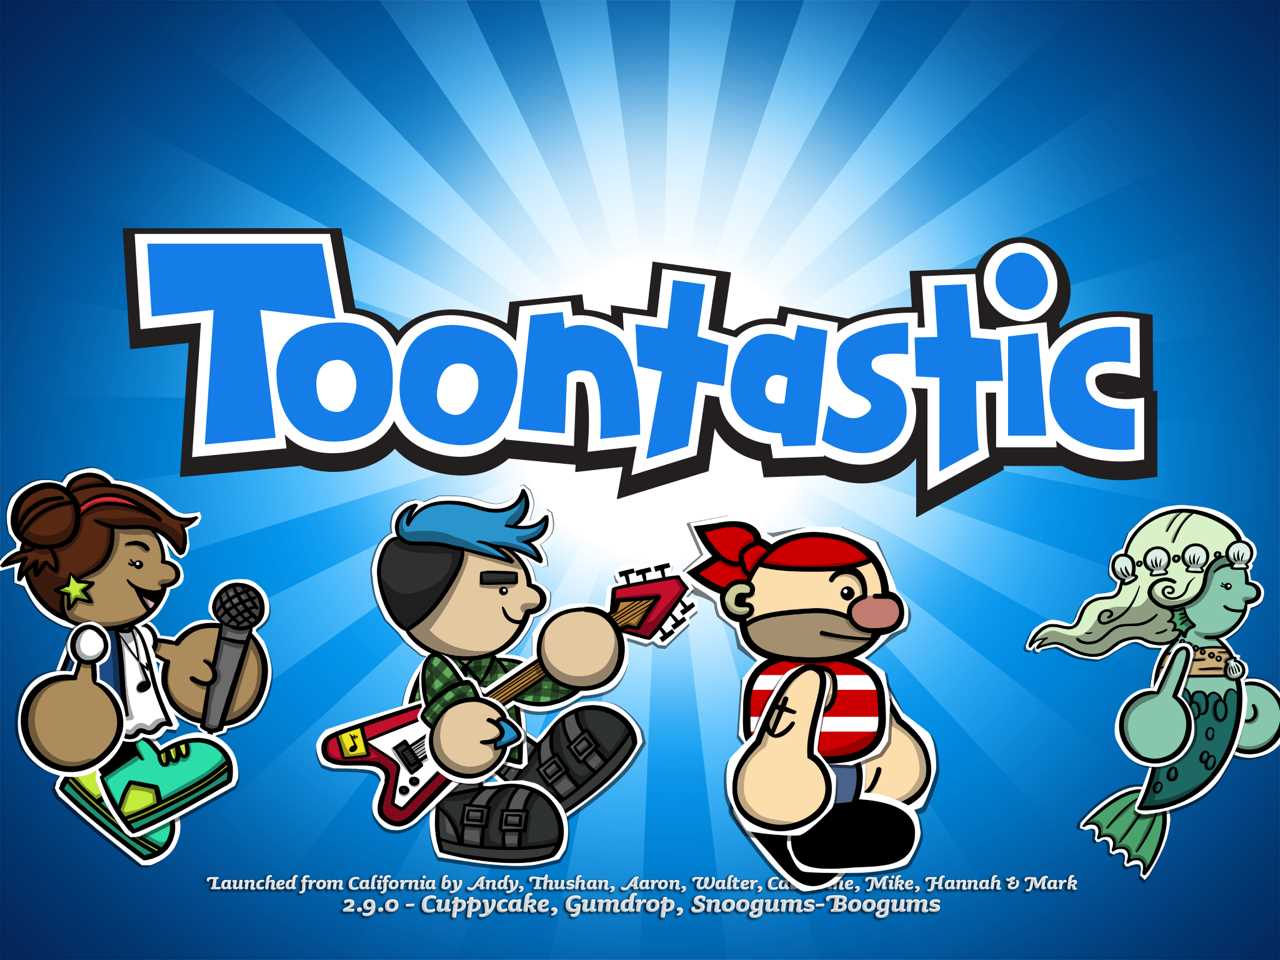
Awesome iPad App: Toontastic

One of my favorite iPad apps is now completely free! Toontastic by Launchpad Toys is a digital storytelling app for iPads. Students use puppets, narration, animation and their imagination to tell a story. Students are guided through a 5 part story arc to develop their story. Final cartoons can be exported to the camera roll or uploaded to the ToonTube website for anyone to view.


Toontastic is available for free from the App Store and includes all the settings and toys from a variety of themes. Finished cartoons can be uploaded to the ToonTube website where can be public or private. Students cannot create accounts. Instead, the teacher would create a class account and all student work would be uploaded to the same location.

Toontastic has a great features that guide students through the steps of building their stories. The task and purpose of each step is explained in easy to understand language, while arrows prompt students to the next step.

Tap Create Cartoon, then New Cartoon.

For each scene in the story arc, begin by tapping the scene, then the Paintbrush.

Select a Setting.

Select Toys (characters) that play a part in that scene.

Tap the Start button and record the story while moving the puppets around the screen with your fingers. There must be narration or you cannot go to the next step.

Add background music to the scene. 

When all scenes are finished, tap the Done button. Give the movie a title and enter the Director’s name. The video will be created and can be exported to the Camera Roll. It's that easy!


Integration Ideas


  • Have students retell a selection from a story read during class.
  • Use the story arc to teach students story development.
  • Have younger students create a simple story with just 3 scenes: beginning, middle, end.
  • Have students recreate a famous scene from American history, such as the signing of the Declaration of Independence.
  • Print out settings and character cards and have the students select characters that normally wouldn’t belong in a setting. Have students create a story explaining what happened.


Resources

I've used Toontastic with several different grade levels. I've developed a few resources that help students create their stories before recording them. These resources are free to download and use as you see fit.

Scenes and Toys - each theme has settings and toys. I've put each theme and all it's toys on it's own page. This makes it easy for students to see all the possiblities for their story elements. It's also useful for rooms where not all students have access to an iPad.

Storyboard Scene - this is a one page planning guide for each scene. Students draw their scene, the characters, and write this part of the story. 

Storyboard BME - this storyboard was designed for my kinder classes that created stories with a Beginning, Middle, and End. Students can plan out their entire story on one page.

Download my Tech Integration Challenge for Toontastic and see if you are up to the challenge!

Read More »

Wednesday, February 11, 2015

Google Earth Pro is free!


Back in January Google announced that Google Earth Pro is now free! Google Earth has always been free, but the Pro version previously cost $400 a year.

Why would you want the Pro version? There is a complete list at the Google Earth Pro product page. Some of the advantages for educators are:
  • measure distances in feet, miles, kilometers, and more
  • measure area and radius
  • record and share Google Earth movies
Read Google's announcement to find links to get a free license key and download the software at http://google-latlong.blogspot.com/2015/01/google-earth-pro-is-now-free.html

How would you use Google Earth? Check out these sites for lesson plans and ideas.
Read More »

Tuesday, February 10, 2015

Cool and Useful Website: TTribune

I recently posted about the Newsela website where students can read informational texts. I came across another awesome site produced by the Smithsonian Institute. It's a actually a collection of 4 websites that also has current news articles on varying Lexile levels.

TTribune is a collection of free websites sponsored by the Smithsonian Institute for use by K-12 teachers and students. Teen Tribune (grades 9-12), TweenTribune (grades 5-8), and TTJunior (grades K-4) consist of daily news stories that include text, photos, graphics, and audio/visual materials. Students can leave moderated comments on any of the teacher selected stories or take quizzes for reading comprehension. There's also a Spanish version of the site.

The TTTribune sites are free. Teachers sign up for free at tweentribune.com/join. Teachers manually create student accounts, which includes a username and password.

Setup

Teachers create an account http://tweentribune.com/join. The site will automatically create 9 classes, which can be renamed.

Students are manually added to each class by the teacher and the system assigns a username and password. The username and password can then be edited/changed for each student by the teacher.

Create an Assignment 

From the home page of the site teachers can browse through the articles. When you find an article you want students to read, click the Assign link at the bottom of each article. From the pop-up window select the class(es) you want to assign it to.


Students can also choose to browse through the available articles and select an article they are interested in and comment on it.

Comments do not appear on articles until they have been approved by the teacher. Click the Comments awaiting approval link from the Teacher menu. This screen can also be used to leave feedback to each student.

Each article has an accompanying quiz that can be used to assess student understanding of the article. There is also a Daily Quiz where students might have to search through several articles to find the answer.


Daily Photos give students the opportunity to view news photos and leave a comment. Captions for the photos are hidden until students post a comment, at which time they can edit their comment.

Student View

When students log in, they will be redirected automatically to a page containing links to the stories you assigned, any message you added to assigned stories, instructions you posted via “Create instructions for your students” and feedback you posted on their comments.

Integration Ideas


  • Pick a controversial story and ask students to post a persuasive argument for their opinion.
  • Ask students to find a comment they disagree with, then ask them to post facts that make an effective, opposing argument.
  • Ask every student to blog on a particular story, then use their responses as the basis for classroom discussion.
  • Ask students to post a summary of the day's top stories to demonstrate that they understand.
  • Ask teams of students to present a "newscast" based on the stories they like best.

The site also has a list of great lesson plans and integration ideas. These lessons can be used over and over because the stories are constantly changing and the answers will be different each time.

Download my Tech Integration Challenge for Newsela and see if you are up to the challenge!
Read More »

Cool and Useful Website: ActivelyLearn.com

I recently became aware of ActivelyLearn.com at the Clark County School District Blended Learning Mini-Conference at Valley HS. I attended a session by @chclteteacher and @weberswords who showed how easy the site is to use to practice close reading skills. Two teachers from one of my schools attended the same session and decided they wanted to share the site with the entire school staff. They asked me, their Digital Learning Coach, to demo the site at our upcoming Staff Development Day. So this week I've been learning everything I can about Actively Learn.

ActivelyLearn.com is a website that lets teachers create reading assignments that have stopping points throughout the text. At these stopping points, teachers can embed questions, notes and videos directly to the text. Students must think and write before moving ahead in the text. Teachers can also embed additional content to enrich the text and to connect the text more closely to what students find compelling.

Watch this 2 minute video to get an idea of what ActivelyLearn can do.

Actively Learn is a free website. A Pro version is available with additional features, such as sharing assignments within a school and centralized viewing of student progress within the school. An email address is needed for teacher signup, but not for students.

Setup

Click View Classes to create and manage your classes. You will be given a class code. Students go to http://www.activelylearn.com/signup and enter the class code to create their account. An email address is not required for students.

Create an Assignment

  1. Click Create Assignments, then Add Content. You can search for articles in the Catalog or add your own text through a URL to an article or upload a PDF. Items in the Catalog can be filtered by grade level (Lexile) or category (subject).
  1. Embed your instruction into the text: highlight the text and insert a question, note, or link to image or video. Inserting a question will let you select a standard to assign to that question. Questions can be either short answer or multiple choice. Notes help provide more information to the reader. Notes can be tagged with text elements. Links can take the reader to other sites for more information.


  1. To assign the text to a class by click Create Assignments, then Assign to Classes, and click Next. In the pop up select the class(es) and click Assign.

Student Work

Students begin working on assignments by first selecting a class and choosing the assignment. They can begin reading, taking notes, answering questions, and defining words.

Download my Tech Integration Challenge for Actively Learn and see if you are up to the challenge!

Read More »

Friday, February 6, 2015

Student Presentations: Moving Beyond PowerPoint

Last week I presented at the Clark County School District Blended Learning Mini-Conference at Valley HS. My session was on Student Presentations: Moving Beyond PowerPoint. When I signed up to present at the conference I hadn't planned on this topic, but when it came up I realized that it was just right for me!

I have a strong aversion to PowerPoint, mostly because presentations are designed so poorly with it. I've sat through enough presentations where the presenter put too many words on a slide, used text and graphic animations that are unnecessary and distracting, or just looked amateurish. There are a number of digital tools out there that can help make presentations more engaging to watch.

My goal with the session was two-fold: help teachers understand the need to teach students proper presentations skills (after all, it doesn't matter what tool you use if still don't present in an effective way) and share alternatives that can easily be used to create effective presentations.

The Haiku Deck used for the presentation is embedded below or you can view it here side-by-side with my notes.


Student Presentations - Created with Haiku Deck, presentation software that inspires

I gave participants a one page version of the points I made.

I also created and shared a chart listing all of the digital tools I shared. The chart lists information about each tool so teachers can make informed decisions about what tools to try out.


Read More »

2015 Mock Caldecott

One of my favorite activities to do with classes is to connect them with other classes outside of their own school. In the past I've helped classes participate in the Global Read Aloud and Mystery Skypes. This past week I was able to watch two elementary schools Skype together for a Mock Caldecott.

I got the idea of Mock Caldecott last year from some blogs that I follow. I put out a request to my schools to see if anyone wanted to participate. I was lucky enough to have two librarians agree to do it. I had initially hoped to connect them with schools outside of Nevada, but I wasn't able to make those connections, so they agreed to do the Mock Caldecott with each other.

I showed them all the material I had, explained how a Mock Caldecott worked and showed them some book lists that I had seen on the web. Then I got out of their way and let them be librarians!

As the time got closer for our Skype session, I stepped in again to help with the technical side. I made sure both schools had Skype installed and they did a trial run to make sure they could communicate. The day of the Skype I was at Gilbert to help with their side of the session.


Wendy Payer, librarian at Gilbert Elementary, explains how the process worked from her point of view:

We've been studying Caldecott possibilities since the beginning of January. Ms. Streng and I looked on blogs, in publications such as School Library Journal, etc. for those books that had "Caldecott buzz" because of their outstanding illustrations. It took us awhile, but we narrowed it down to 6 books:
  • Flashlight by Lizi Boyd
  • My Teacher is a Monster (No, I am Not) by Peter Brown
  • Bad Bye, Good Bye by Deborah Underwood
  • Gravity by Jason Chin
  • Viva Frida by Yuyi Morales
  • Sam and Dave Dig a Hole by Mac Barnett
To these, I added Emily's Blue Period by Cathleen Daly and Gaston by Kelly diPucchio; I know Ms. Streng added some titles, as well.

I created a critique format for each of grades 3-5 asking students to evaluate how well the illustrator conveyed character and character traits, setting, overall mood, and the students' personal opinion. In addition, each grade had to write a brief response based upon CCSS RL.(3/4/5).7.

I created an anchor chart for the steps I wanted the students to follow for evaluating the books, as well as a reminder of the steps for Visual Thinking Strategies, an arts-integration strategy we use at Gilbert.

The first week, I modeled the process with Emily's Blue Period. In the following weeks, I placed each of the books at a separate table and had the students rotate in small groups to evaluate the books and fill out their critique forms. Since we didn't do this for the 6-7 weeks it would have taken for each group to read each book, I let students choose their books the final week.

The actual Skype session took me by surprise, because I wasn't expecting my first group of third graders to completely clam up. In our debriefing afterwards, they told me they were "freaked out" because the kids at Triggs were strangers, and 5th graders! If I were to do this again, I would match grade levels more closely, at least for their first attempts at Skyping. I also would take another week or two, regardless of when the actual award is announced, so that my students could practice presenting their chosen books. That being said, I think my students learned a lot about how hard it is to communicate remotely; even though it seems like it would be easy, it's not. You have to consider voice level, placement of the computer, how you're going to show the other class the illustrations you're talking about, etc.

I've talked to my principal about this experience, and we're going to try having my classes Skype with her from her office so they can get some experience with the process. Hopefully this will build their familiarity and confidence so that we can all be more successful next time! This is absolutely something I want my students to continue to do.

Teanna Streng, librarian at Triggs Elementary, explains how she prepared for the event:

As a new librarian, I was unsure about taking on the task of participating in a Mock Caldecott.  After the experience, I can say I'm looking forward to making it a tradition at my school!

The first week, I introduced my students to the award, discussed the criteria the judges use to select a winner, read aloud previous Caldecott winners, and allowed students the opportunity to look at a variety of past Caldecott award winning titles.

The second week, I provided my students with a "kid friendly" Caldecott scoring sheet.  I allowed students to work in teams to score and discuss several "Caldecott Contenders."I chose 18 "Caldecott Contenders" by consulting a variety of websites and looking for titles that were featured on multiple lists of books being considered for the award.  We narrowed down the selection of 18 titles, to our top 6 for a school wide vote.

The third week, I reviewed the judging criteria and read aloud 2-3 of the "Caldecott Contenders," from our top 6.  5th grade students worked in teams to create supporting statements for each of the judging criteria for their chosen book.  Students in grades 1-4, wrote an opinion statement on large sheets of butcher paper for their favorite book to win the Caldecott "I like this book because____." or "I think this book should win because____."  I created a Google form with the 6 titles, and students voted for their favorite book on the library computers.

At the end of the week, I chose 4 teams of 5th grade students with the strongest arguments for their books to Skype with students at another school.  During the Skype session, groups took turns making their claims for the books they wanted to win the Caldecott award and asked clarifying questions about the titles being shared.

I calculated the votes, and made an announcement during our school's morning newscast for the official Caldecott Award winners, and the results of our school wide "Best Picture Book" vote.  Our school's top 2 choices (Hug Machine and Baby Bear) did not receive any Caldecott awards, but our 3rd place title "The Adventures of Beekle: The Unimaginary Friend," was awarded the Caldecott, and our 4th place title "Sam and Dave Dig a Hole," was given a Caldecott Honor award.

This activity incorporated a variety of ELA and library standards, including reading award winning literature, understanding character, setting, and events using details from illustrations, forming/writing opinions, and collaborating with others using technology (Google Forms/Skype).

Teachers shared with me how excited the students were when the announcements were made, and the students have been eager to check out all of the titles we've been discussing.  I think it was a great learning experience, and helped the students participate in meaningful conversations about literature across grade levels, and for those who participated in the Skype, across our school district.  I'm already looking forward to next year's Mock Caldecott!  
 I am thrilled that I was able to bring these schools together! I believe that it will be an experience that students will remember. As an avid reader who absolutely loves picture books, it was awesome to see the entire school get into the books and take part in the voting. As a techie nerd who loves global collaboration, it was awesome to see two schools connect and share via Skype!

Could this entire project have been done without Skype? Of course! But sharing makes it more authentic and sharing with another school entirely brings the world just a little bit closer!

I look forward to working with these schools, and hopefully others, next year.

Read More »

Thursday, February 5, 2015

The Game Design Project

I recently had the opportunity to work with one of the ELA teachers at Swainston MS where I work as a Digital Learning Coach. Dana Hazzard approached me about teaching her students how to code using her class set of iPads. The idea presented to me was that the students would write a story for her that included some kind of game element. I would then teach the students how to code a game based on their in-story game.

I had taught elementary students how to code using Scratch, so I knew the potential and how easy it would be for students to understand coding concepts. This was done with the desktop and web-based versions of Scratch and I knew nothing about what was available for the iPad. After trying out several apps I finally settled on Hopscotch, an awesome app designed specifically for students to learn all about coding. I discovered Hopscotch's YouTube channel with many great tutorials. I settled on their 2014 Hour of Code tutorial for creating a food fight. Armed with these ideas, I spent all day in Dana's class, walking her students through the tutorial so they could get the idea of how Hopscotch in general, and coding in particular, worked.

Here's what Dana had to say about the project:
Working with technology in language arts is something I always try to incorporate in the classroom in an attempt to give my students exposure to the digital world and its’ every increasing importance.  When we do projects in class, I always give kids options to present information through media and that benefits kids with access to technology, but I wanted to do something that would give all the kids the chance to create with technology.  A lot of my students lack access to technology except at school and the ones with the least opportunity need the exposure the most.  The problem was to figure out a project that involved something that would be new for most, if not all, students that could achieve the goals of the content and keep students engaged.  Having the kids create a game seemed like a great idea. I frequently teach the elements of plot by having the 7th graders analyze their favorite video games. There’s a lot more buy-in from kids when they realize that their computer games use plot structure. Unfortunately, I knew that my coding skills were not up to the task and I didn’t have time to put myself through a crash course.

I worked with Mark Thomas, the digital learning coach for Swainston Middle School, on a way to have the kids start coding.  He suggested a software that needed to be installed on the iPads and we set up a schedule.  Once I had the end portion of the project in motion, I started working on the beginning.  So many students tell me that they want to be game designers that this as an opportunity to get them to learn about more technology jobs.  The project started with an article about the similarities and differences between programmers, game designers, and graphic illustrators. The students had to answer fact-based questions in sentence and paragraph format (DOK 1&2). In the next portion of the project, they had to write an original story that involved a food fight, invasion, or a maze (DOK 3 & 4). They spent hours perfecting their stories. The homework completion rate for the first two sections was over 85% for all classes. 

Mark Thomas spent a full day with us. My classes stay with me for Reading and English, so the students had 100 minutes of learning how to start their games.  I was so glad that I decided to ask Mark to work with the classes. He guided them through a process that I knew would have been difficult for me. He was so relaxed as he guided them through this process that the kids I thought might become frustrated didn’t.  The classroom was 100% engaged the entire time.  I gave the classes an hour each day to work on their games.  Each day they decided what they needed to do on their game the following day to help with organizational skills (DOK 3). Since I do not know how to code, the students had to rely on each other to figure out their problems, and they did. When the students couldn’t figure it out, they wrote down the questions to ask Mark later. They figured out problems and then started creatively manipulating the program to add facets to the game that Mark and I had never discussed. Several kids found that the game they created did not match the story that they had written and that was a major portion of their final grade, so they rewrote their stories.  Friday Mark came back and spent the day to help the kids with trouble-shooting.  Some classes barely needed him at all. Other classes never let him sit down. There were some tears along the way. One student found her game disappeared and she broke down—for a minute. Then she picked herself up, figured out what the problem was, and found her game.  That lesson alone is invaluable.

Students who had completed their games were deemed computer experts and they walked around the class to help their classmates.  One class ended up with six computer experts, but trouble broke out when one student named himself management and the other five quickly unionized. 

On the following Monday, the students read each other’s stories and played each other’s games.  I walked around and graded the games and stories while others played. The class was completely engaged. In fact, the classes had been entirely engaged for the full project.  The students were hard on each other. If the game and the story didn’t match, they told each other about it. Some students had managed to put Easter eggs into their games and the game reviewers were frustrated by being unable to crack the code.  All of the students had finished their games, but some games were better than others and they are consumers with high expectations.  This made me really glad that I had set up the evaluation so that they had to write at least one nice thing about every game. They wrote one nice thing about the game, but then made suggestions of how the game could be better or that the story needed to match the game more closely. 

We finished the project with students writing evaluations of the project for me and thank you notes for Mark. It was a complete success. The most common remarks were about the new appreciation that they had discovered for game designers and technology careers. Several students who do not have access to technology at home wrote that they hadn’t really considered a career in technology, but that idea didn’t seem so crazy now. Many wrote that they hadn’t expected it to be so hard followed by a request to do this project again.  A lot of students talked about how they know understood the connection between stories, plot structure, and games.  It probably helps that I have been connecting those three together since September, but I was glad to see that the connection finally seemed real to them. 


Upon reflection as a teacher, this is a project that I will definitely do next year.  It incorporated informational text in the article they read and analyzed, creative writing in the stories they created, and application by creating a game.  It hits the Nevada Academic Content Standards in several ways—RL 7.7, W 7.3, 3a, 3b, 3c, 7.4, 7.7, 7.9, 7.10, and SL 7.1b. It hit DOK 1 and 2 in the beginning portion of the project, and DOK 3 and 4 with the story creation and game creation. It helped them develop some of the 21st century skills that they need, but schools don’t always get to teach, and it opened their eyes to new possibilities. It reinforced hard skills like reading, writing, and synthesis as well as soft skills, such as organization, being helpful to others, being grateful for opportunities, communication, and perseverance.  The project was relevant to the students. 

I had set up the scoring process so that students who did the work would score well, which I will also continue. I wanted the students to be focused on learning, not on the assessment, and that also helped them relax. The one change that I will make to next year’s version of this project is that I will increase the informational reading, and spend a little more time on the writing process. The project took about a month altogether from when I gave them the first reading assignment to the game-review day. In class, the entire project took 8 class hours: 1 hour setting up the project and going over the informational text with them, 6 hours creating the games, and 1 hour evaluating the games. 

As a teacher, it was a great way to work with the digital coach. We have digital coaches, but I don’t think teachers always know how to use their expertise.  I began by having a 15-minute meeting with Mark explaining what I wanted to accomplish. He made recommendations of how to meet those goals, researched the software and made recommendations, and rearranged his schedule to be there. He made it simple for me to turn my class into a high-tech experience for the students.  I recommend that teachers excited by the possibilities of combining technology and content area talk to the digital coach about how to make it work in the classroom, especially if you are lucky enough to have Mark Thomas as your digital coach.
This was a phenomenal experience for me. I was concerned about students becoming frustrated with coding. I was also afraid that the time they spent without me would degenerate into chaos and problem after problem. However, when I came back on Friday to see what they had done, I was totally amazed! Students had gone far above and beyond my expectations. They had complicated game routines, intro sequences, game elements that I had never thought of, and a ton of creativity! There had discovered and used other commands in Hopscotch that I hadn't even touched on.

There were a couple of serious problems we had to figure out. But when I explained to the student why the game behaved it did, they always understood what to change in their code. There was only one problem that I could not solve and I still want to go back to that iPad and figure it out. But the girl who had coded that game had done something so awesome and complex that I don't think I'll ever be able to figure out what went wrong.

These are the kinds of activities that make teaching worth it. Students demonstrated collaboration, creativity, and critical thinking. If you have Hopscotch on your iPad, search for Swainston and check out all the awesome games these students created!

Read More »

Cool and Useful Website: Newsela


Today's Common Core State Standards emphasize the need for students to be able to read and understand informational text. Finding informational text for the varied reading levels of students can be challenging. Newsela is an awesome website that gives you access to hundreds of leveled news articles that are updated every day. Articles are available for reading levels from 3rd grade up to 12th grade.

Each high interest article is rewritten at four different Lexile reading levels, as well as the original article. Students can take a short quizzes associated with the different Lexile levels to assess their comprehension. If they struggle with the quiz or find it too easy, they can read the story at a lower or higher Lexile level. Because all students are reading the same material, teachers can lead class discussions on the article topics with all students, no matter what their reading level.

Teachers can sign up for a free account. There is a Pro account available with more features. Once signed in, teachers can create classes. Each class comes with a unique code, which students use to create their own account and join the class. No email is necessary for students!

Teachers can browse through the articles and select passages to assign to their students. Teachers can browse articles on the main page or look through the categories across the top of the screen. Teachers can also search by grade level, alignment to CCSS, or available quizzes. Once the teacher finds an article, they click the button to assign it to the class binder.


Student then log in to their account and read the article. If there is an accompanying quiz, they can take the quiz. Teachers can create current events worksheets to assess student comprehension. Here is an example, as well as many other examples on Pinterest.

Students are also able to make their own reading choices, searching for and selecting articles to read that interest them. The progress on these self sections are also available for the student and teacher to see.


As an added bonus, every article and quiz can be printed. This is great for situations where students have limited or no access to the internet. These printed articles could also be shown under a document camera to practice whole grope close reading strategies.

Download my Tech Integration Challenge for Newsela and see if you are up to the challenge!

Read More »

Cool and Useful Website: PurposeGames

Students love to play games online. The problem with most games teachers find online is that they are not perfectly suited to the material presented in class or adequately address the topics students need to master. PurposeGames is a website teachers can use to create their own games that covers all the material they want or need.

The easiest way to get started is to simply go straight to the site, choose a game and start playing. Registration is not required to play the public games.


Creating an account is easy and free. After creating an account teachers will be able to create a few different kinds of games, any of which can be based on a picture uploaded through the website.

  • Quiz Game (dots) Create an image based quiz game using dots. Just upload an image, place dots for questions. 
  • Quiz Game (shapes) Create an image based quiz game drawing your own areas, using shapes instead of dots. Upload an image and get started.
  • Multiple-Choice Game

With an account teachers can also create groups and invite students to join their group. This is a perfect way to let classes practice, get assignments and take tests!

Teachers and students can also create playlists to keep their favorite games in one location.

Teachers can also create tournaments within their group. This lets students play agains each other to see who knows the material better.

Playing games is an excellent way for students to practice material and determine mastery of content. Let me know in the comments when you create your games so I can check them out.
Read More »

Formative Assessment Toolbox: FlipQuiz

FlipQuiz is a site that allow teachers to create Jeopardy-style quiz boards for test reviews or game nights. Teachers can sign up for FREE and create as many boards as needed. The boards can then be presented in front of a group of students to review for a test or practice mastery of content.

You can view an example of a FlipQuiz board at http://flipquiz.me/demo or check out boards other teachers have created at http://flipquiz.me/boards/recent.

The pro version has a few additional features that would make it worth the subscription price:

  • Team scoring for up to 10 teams
  • Image upload to answer cards
  • Copy other user's quiz boards
  • Create flash cards
  • Set boards to private
  • Set custom points


Creating a board is super easy. Click the New Board button from the dashboard or My Boards screen. Fill in a name for the board at the top of the screen. You can change the category names, and enter the questions and answers.


Once your board is complete, you can click the Presentation View to play the game. Boards can also be embedded on a webpage for easy access by students.

One of the great features in Presentation mode is the ability to set a countdown timer. In the bottom right corner click the clock icon. Just type in the number of seconds you want to count down and hit start. When the clock strikes 0, you'll see a flash of color to know that time is up! You can also check the "AUTO" box to let the countdown begin and end automatically as you choose questions.

I'm excited at the possibilities of this tool to help teachers check for understanding. If you use it, please let me know how it worked for you in the comments below! 

Read More »

Formative Assessment Toolbox: Plickers


Plickers is a classroom response app that teachers can use very easily without having devices for each student. Each student is assigned a card (printed from the website) with a unique shape on it. The teacher then uses a smartphone app to scan the cards and view student responses. Responses can also be displayed in real time from the website.

Plickers is entirely free. You will need to download the free app for your smartphone in order to scan the cards. The cards can be downloaded from the website and come in sets of 40. They can be laminated or printed on card stock for durability.

How It Works

  1.  Login with or create your free Plickers account.
  2.  Click the Classes tab and create a new class or modify the Default Class.
  3.  Open the class and type in student names. Students are automatically assigned a card number, but you can drag and drop a different number on to a student name.
  1.  Click the Library tab to create questions. You can create Multiple Choice or True/False type questions. Currently there is not a way to group questions by lesson or topic. A way to get around this is to put the standard number or lesson number at the beginning of each question. Questions must be assigned to a specific class.
  1.  Download the free app for your smartphone and login to your Plickers account. Select your class and the question to ask.


  1. Tap the camera icon, hold your phone in portrait mode, and scan your student’s cards. Student names will color code to indicate their answer. Rescan different areas of the class until you’ve gotten all student responses.
  2. Live View lets you display the current question and share real-time responses from students.
  1. At this time the only Report available is a single completed poll report.

Integration Ideas

  • Create an on-the-fly poll on the smartphone by tapping the + button, then the correct answer letter, and then scan the “empty” question.
  • Exit questions - to gather end-of-class info for planning next day’s learning
  • Quick response for in-class practice
  • Vocabulary practice
  • Have students create questions for projects that they are going to present and put into Plickers so that the students can assess if their classmates understood their presentation.
  •  Plickers doesn’t allow pictures or math problems. Get around this by putting those in a PowerPoint and display that on the screen.
Download the Tech Integration Challenge for Plickers and see if you are up to the challenge!
Read More »